this post was submitted on 28 Jul 2023
16 points (100.0% liked)

3DPrinting

15250 readers
29 users here now

3DPrinting is a place where makers of all skill levels and walks of life can learn about and discuss 3D printing and development of 3D printed parts and devices.

The r/functionalprint community is now located at: [email protected] or [email protected]

There are CAD communities available at: [email protected] or [email protected]

Rules

If you need an easy way to host pictures, https://catbox.moe may be an option. Be ethical about what you post and donate if you are able or use this a lot. It is just an individual hosting content, not a company. The image embedding syntax for Lemmy is ![](URL)

Moderation policy: Light, mostly invisible

founded 1 year ago
MODERATORS
 

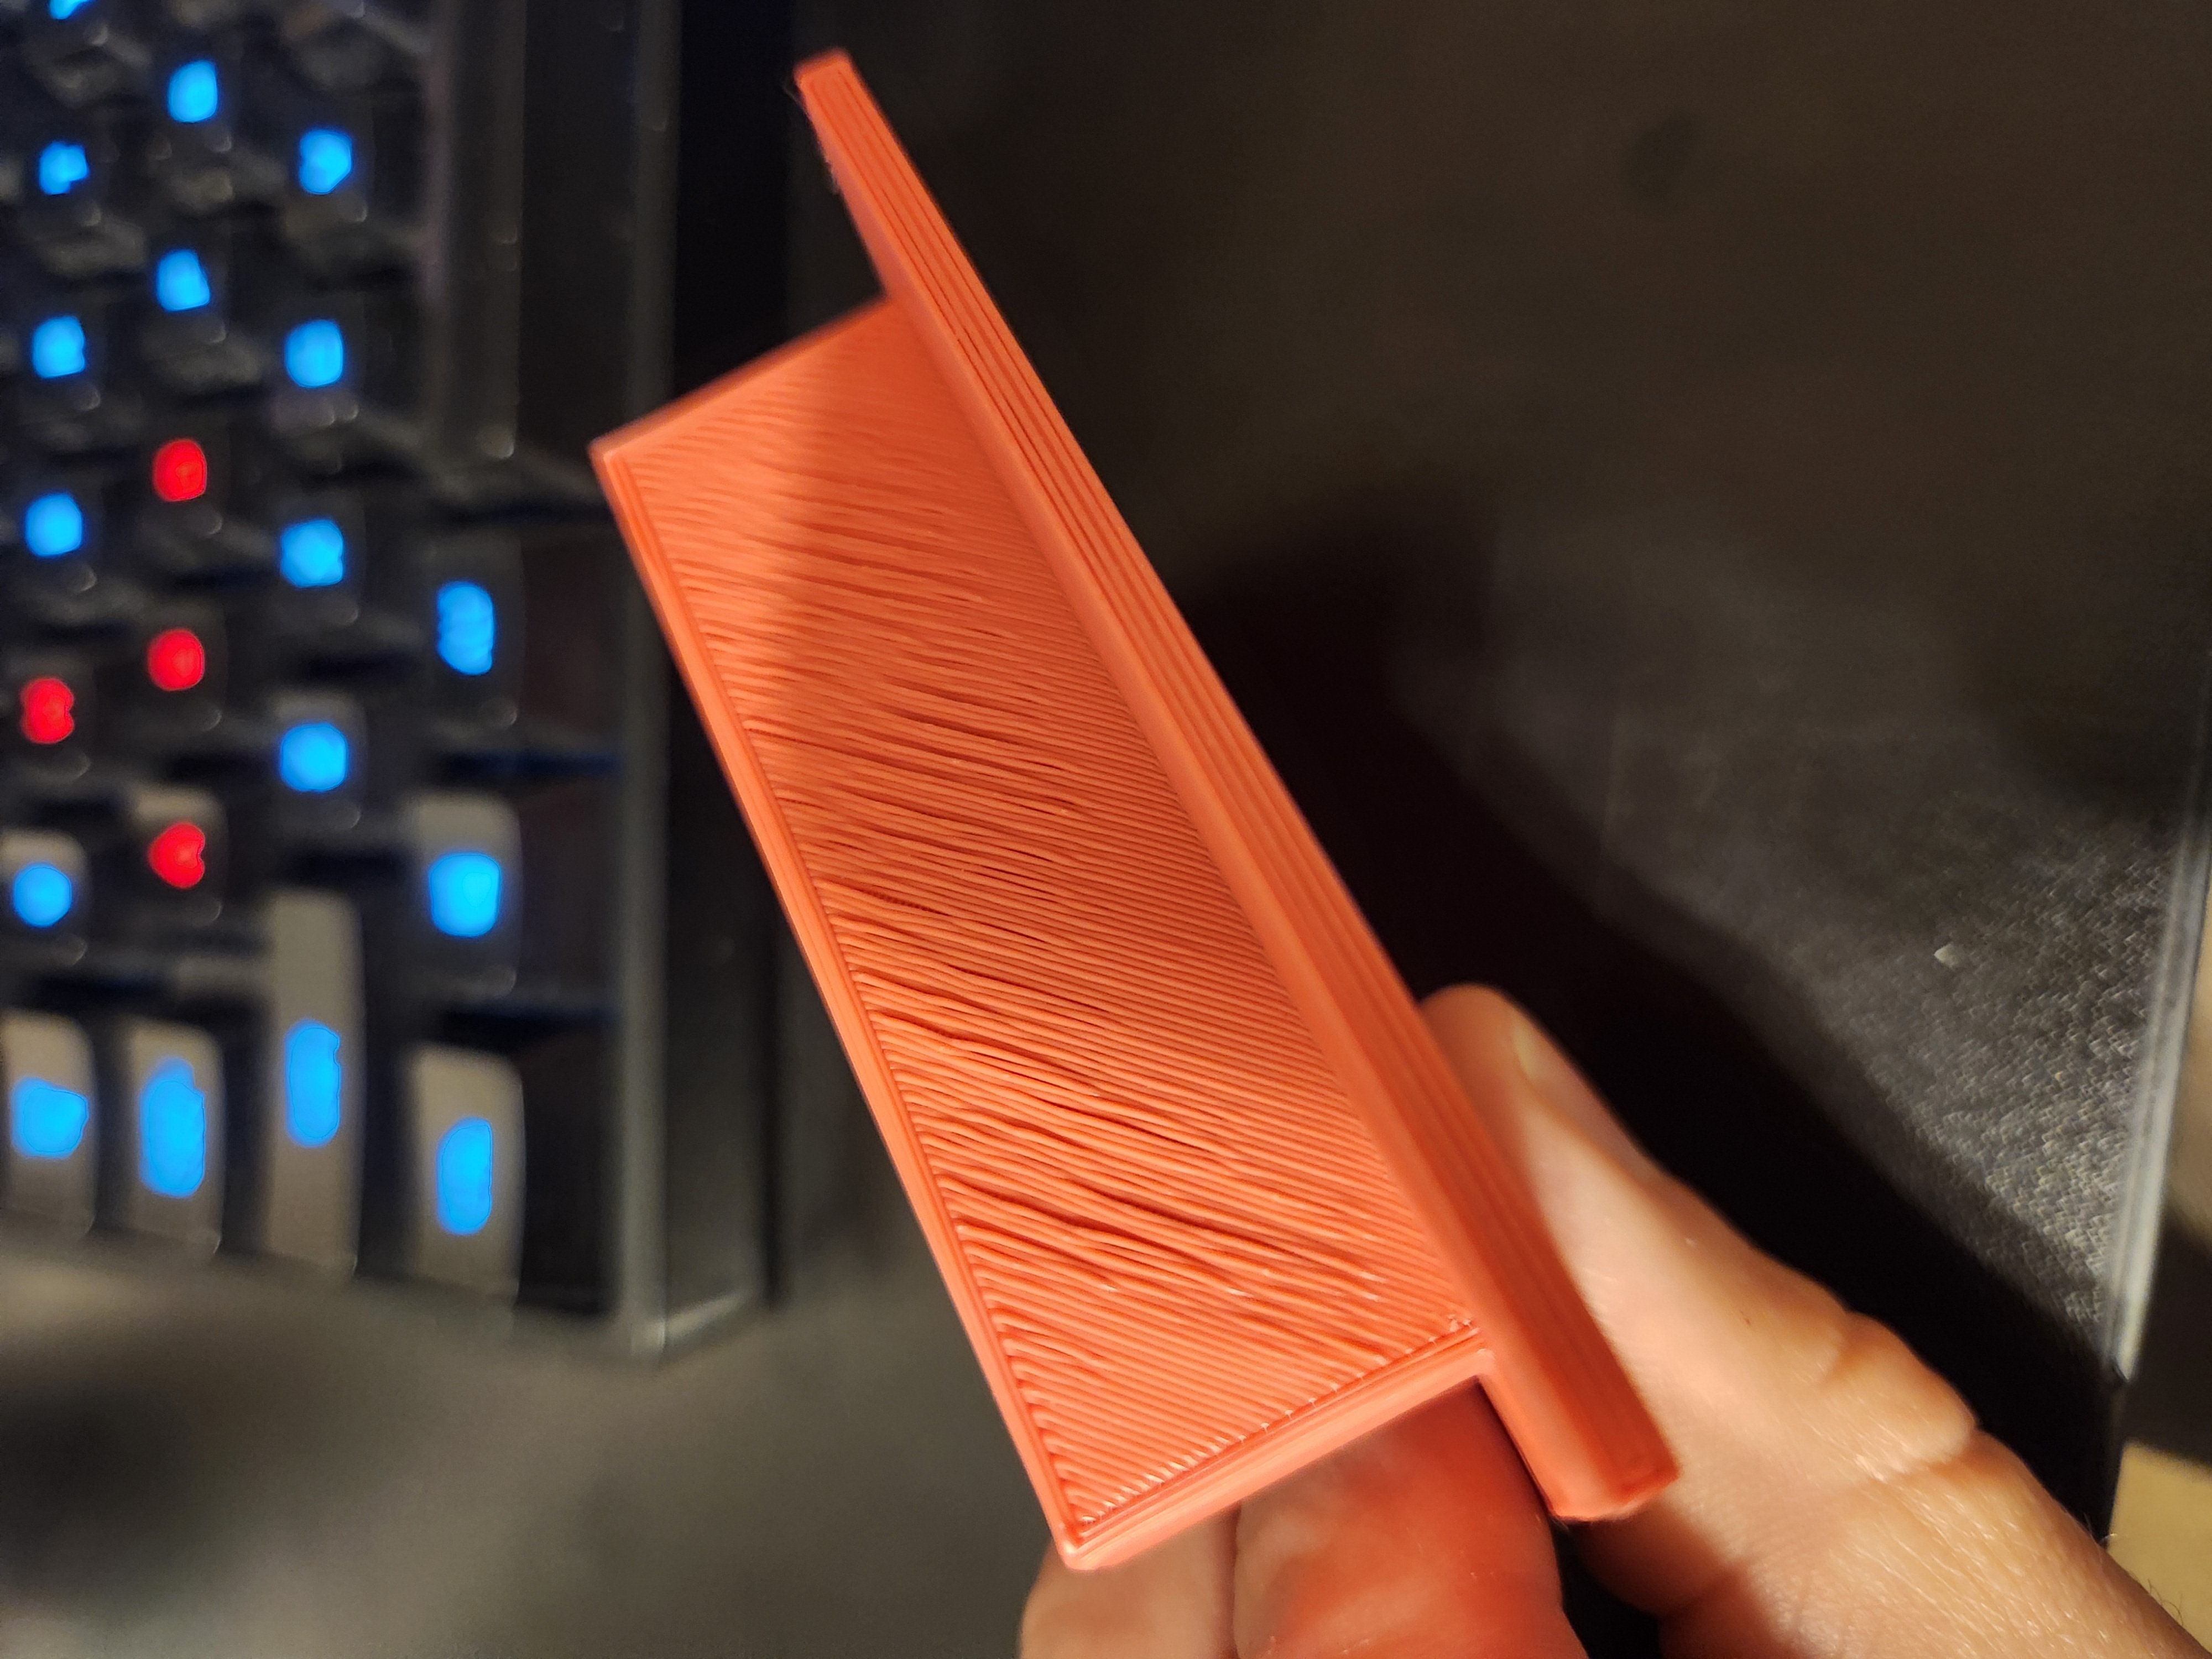
I've been getting some problem layers with this filament, especially on flat pieces like this. The first layer is always good, but flat layers (top and bottom) that are not on the bed are not great, like the filament is sagging and not connecting to the lines next to it, regardless of if they are supported or not. This one was a flat layer (completely horizontal) that was fully supported with the zigzag supports from the sovol version of cura.

I know ideally I wouldn't have totally flat overhangs like this but with the piece I want to print there isn't really a way around that other than printing multiple flat parts and gluing them together.

I am using a Sovol sv06 and overture PLA. I did not have this issue with the sovol silk silver pla.

I've tried leveling my bed again and I think mu z offset is OK because the first layers look good. Currently I'm printing another temp tower and will try some other calibration pieces but any help is appreciated

all 18 comments
sorted by: hot top controversial new old
[–] [email protected] 4 points 1 year ago (1 children)

You are underextruding, but it would also help if you add few more top layers. You have gaps in walls as well. You might be underextruding due to wrong flow (or esteps) or too low temp, but there are other possible reasons as well. Try printing at 105% flow

[–] [email protected] 4 points 1 year ago (1 children)

And one more thing, you said your first layer is always good. It can be good because you have perfect nozzle/bed distance and flow, BUT it can also look good if your distance is wrong and you compensate it with flow. So you might need to increase both flow and distance. You can also change flow for first layer only or change flow after first layer

[–] [email protected] 0 points 1 year ago (1 children)

For calibration you need temp tower and flow tower. You can just print hollow single wall cube with no top/bottom to make it quick print. Keep in mind that PLA especially quality one is quite forgiving so temp tower might look the same at all heights. Meassuring diameter and tuning flow will probably solve your problem

[–] [email protected] 1 points 1 year ago

Thank you for the information! I did do a temp tower and the layers do look similar but there seemed to be a sweet spot with less sagging and stringing at 200C so I'm printing there. I have not done a flow tower so I will try that and see if I can get the flow calibrated, and re-do my z-offset and bed leveling stuff.

I am very new to 3d printing (less than a month) so I'm still trying to figure out all the things I can troubleshoot. This is very helpful!

[–] [email protected] 4 points 1 year ago* (last edited 1 year ago) (2 children)

In my experience this is just how 90° overhangs are. It can't be perfectly flat because if it was it would fuse to the temporary supports. You might be able to get better results with better fillament cooling (or lower fillament tempatures), but afaik some artifact will always be there. So unless I'm mistaken you can't really "fix" this issue and you are most likely better off designing around it and adding some extra tolerance when you have to use overhangs like this.

[–] [email protected] 1 points 1 year ago (1 children)

You can change the support top layer settings and mess with if there is top layers and how many there are, then adjust the gap between support top layer and the first layer of the print on top of it until it’s supported correctly and comes away easily.

[–] [email protected] 1 points 1 year ago
[–] [email protected] 1 points 1 year ago

I have thought of that too but I didn't have this issue with the other filament I used. The 90° overhangs were rough, but they didn't have lines falling off like with this one.

If I can't figure this out I will just re-design the piece to print in two parts and get some 3d gloop or something to stick them together

[–] [email protected] 2 points 1 year ago (1 children)

Looks like you might need to level your bed. That or you need to run temperature test cube. Some filament run better in different temperatures. For me, when I find a brand/color that I works well, I keep using it since I know it's operating temp.

[–] [email protected] 0 points 1 year ago (1 children)

I did do a temp tower test and found a good temperature. I did try running through the auto bed leveling on the SV06 as well and it didn't change anything. I have read other methods of bed leveling that are better for the SV06 so I may give those a try too.

I can definitely see the advantage of sticking with one brand of filament. Being new I kind of assumed PLA is PLA but there has been a noticeable difference between the two that I have tried

[–] [email protected] 1 points 1 year ago (1 children)

Did you ever fix your issue?

[–] [email protected] 0 points 1 year ago (2 children)

Yes, I put a top level comment with details. The e steps were off causing it to under extrude

[–] [email protected] 2 points 1 year ago (1 children)

I don't see that comment here for some reason.

[–] [email protected] 1 points 1 year ago

Oh that's odd. The direct link to it is here

[–] [email protected] 2 points 1 year ago

Fantastic! Glad you fixed it :)

[–] [email protected] 1 points 1 year ago

I’ve had best results with Cura, trees, support interface on using “grid” with “0.8mm interface thickness” and “75% interface density”, and when printing with 0.2 layer thickness and 0.1 gap between support and model (which then snaps to the 0.2 layer thickness)

[–] [email protected] 1 points 1 year ago

I watched a few videos on adjusting flow rate and ended up checking my e steps and they were quite a bit off. After fixing that I did a single wall cube to test flow rate and the measurements were right on.

I printed my test piece again and it is way better. I did slice this one in the regular Cura and not the Solvo version since that's what I was using to generate the flow tests but I had all the settings pretty much the same.

Thanks to everyone for the help and suggestions! I will be tweaking my flow and support settings a bit more I'm sure but for now I'm happy with the result

[–] [email protected] 1 points 1 year ago

You might be able to get marginal improvement for overhangs by adjusting support z contact distance, if I'm understanding your problem correctly. I'm usually fiddling a bit with mine, too close and supports are hard to remove. Too far and mine looks close to this.