bistdunarrisch

joined 8 months ago
[–] [email protected] 4 points 6 days ago* (last edited 6 days ago) (1 children)

I use uYou plus. It has to be installed via Altstore (which means you have to resign it once a week with a computer needed in the same network).

But it has the best features:

  • Adblock
  • Sponsorblock (automatically skips sponsor segments in videos)
  • allows pip playback
  • shows estimated dislikes again
[–] [email protected] 3 points 6 days ago

Dank dem Gesetz haben wir nun endlich auch ein BKW. Unsere Hausverwaltung hat in der Eigentümerversammlung angekündigt, dass ein Ablehnen in Zukunft nicht mehr möglich sein wird, und so konnten alle Parteien überzeugt werden. War trotzdem ein langer Kampf, und ohne diesem Gesetz unmöglich.

Ich hoffe das wird vielen anderen genauso helfen.
[–] [email protected] 1 points 1 week ago* (last edited 1 week ago) (1 children)

Thanks for sharing! The software worked better than expected on your image!

On my research before purchasing the program I also stumbled over your linked forum post. However I found it very misleading, as the software does not generate details learned from other images but only works with data already in your image. As it is a deconvolution tool results can deviate slightly from the true nature. But that has little to do with AI being used here. I needed a whole semester at university to truly understand the maths behind it. My biggest problem is that the software isn't open source so one can't look into all the details. But there are already people working on open alternatives.

But this already is a very specific problem, don't forget that the biggest difference for good quality makes the data itself. I wish best of luck on your journey!

Oh and I forgot to mention that one other advice I would give is to search the darkest location to shoot from that you can access. Lightpollutionmap really helps with finding such places.

Edit: unstreched file with only background extraction and deconvolution: https://drive.proton.me/urls/QD4870ZMF4#uyVBYxKgWxgb

[–] [email protected] 5 points 1 week ago (3 children)

For untracked this looks not too bad. To improve I would do the following:

  • in Siril: remove green noise, then photometric colour calibration
  • reduce exposure length to 1s
  • work on background extraction (maybe try GraXpert)
  • if you are not already doing: take calibration frames, especially flats

Are you interested in sharing the raw stacked file? I use a (paid) deconvolution tool called BlurXterminator and I wonder if it can handle such extreme star shapes. If it works I will of course send you the file.

[–] [email protected] 2 points 1 week ago

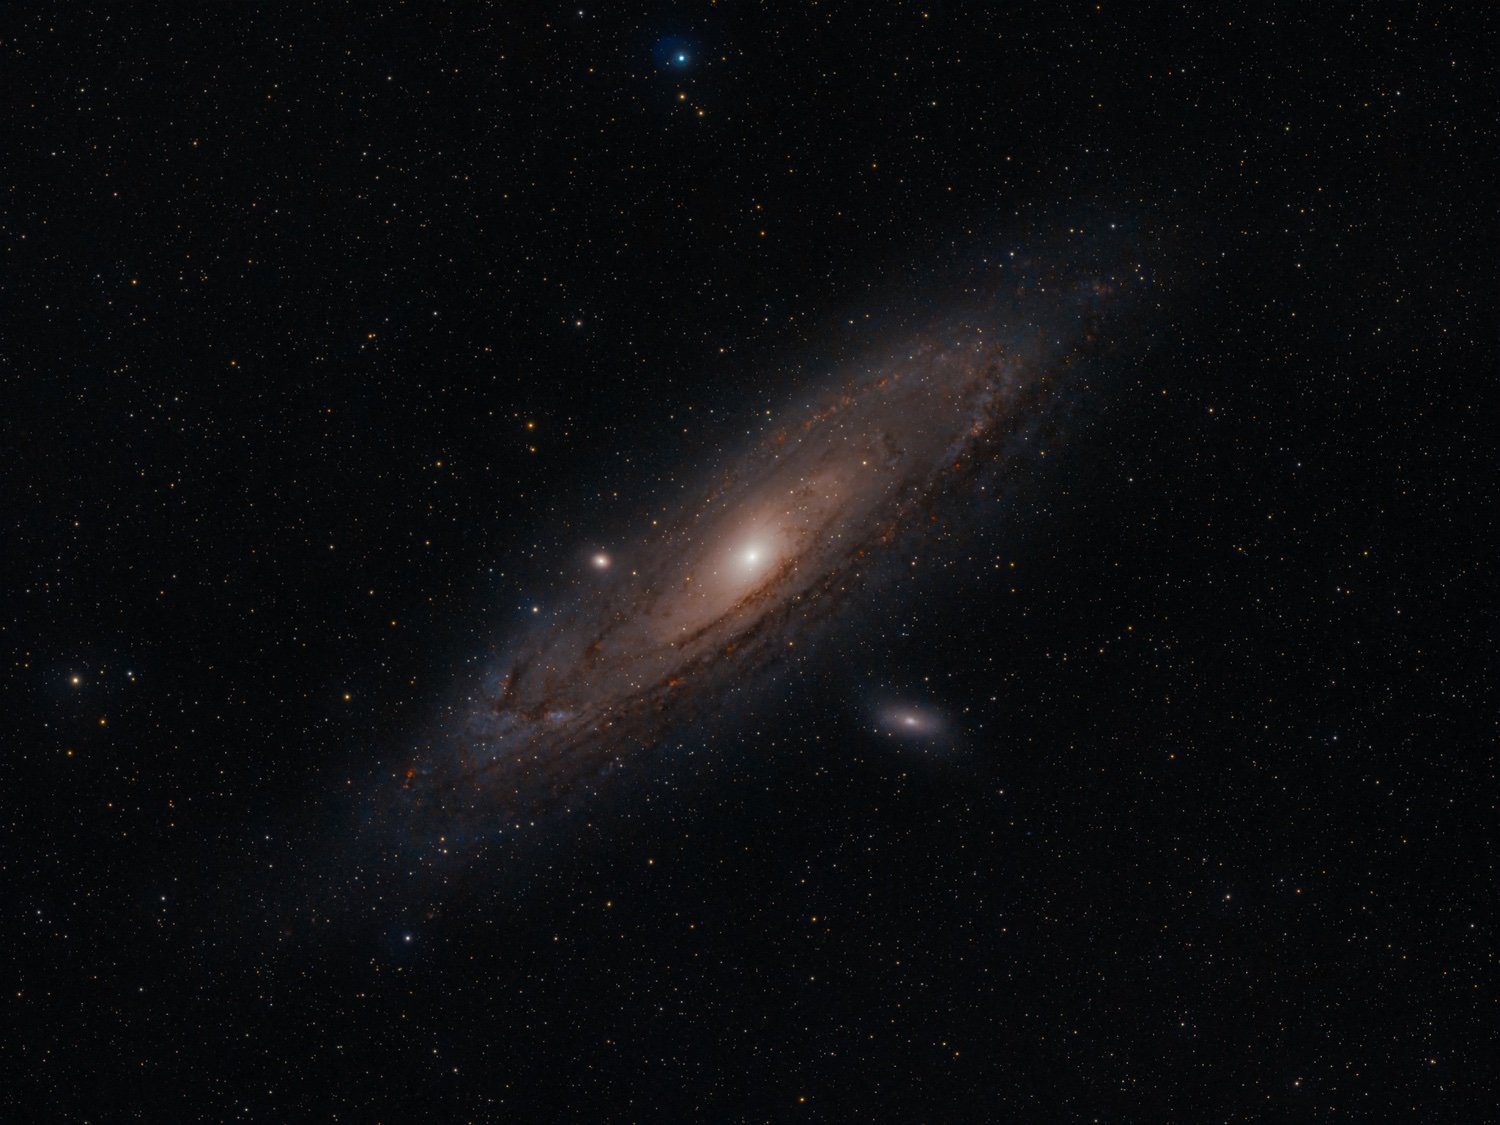
In amateur astrophotography narrowband filters are used to reveal interstellar ionized gas clouds. In this case you can see hydrogen nebulae as red blobs in the spiral arms around M31.

Well for the high cost, apart from producing them is technologically challenging, it is just simple economics. The market for these filters is still small compared to other things, so the price must be higher to compensate production and development.

[–] [email protected] 10 points 2 weeks ago

Tl;DR The EU makes sure that third party developers gain access to connectivity features to develop devices like smartwatches, headphones or VR headsets that have a deep integration to the OS.

It is crucial that the request process is transparent, timely, and fair so that all developers have an effective and predictable path to interoperability and are enabled to innovate.

[–] [email protected] 2 points 2 weeks ago (1 children)

No not for this target. As I use a dual narrowband filter I‘ll always get OIII as well, but as you said in this case it just shows the normal continuum. I shot this data to combine it with RGB in the future, but I liked how M31 looks with just narrowband so I wanted to share anyway.

[–] [email protected] 8 points 2 weeks ago

The equipment put together:


M31 shot only in Ha and OIII.

Equipment:

  • Samyang 135mm f2.0
  • Fuji X-T5 unmodified
  • Star Adventurer 2i
  • STC dual narrowband filter

Images:

  • 650x 60s
  • ISO 3200

Processing:

  • remove green noise
  • background extraction
  • photometric colour calibration
  • BluXTerminator
  • NoiseXTerminator (0.4)
  • star removal
  • GHST
  • saturation, blending and final adjustments in Photoshop
[–] [email protected] 1 points 3 weeks ago

I couldn’t agree more, thank you for sharing so much information!

[–] [email protected] 4 points 1 month ago

We were in exactly the same situation and bought a Fuji camera. We are very happy with our decision as we can shoot both 'normal' photography with the feeling of a nice camera body and astrophotography on a beginner level.

The results we got so far exceeded our expectations by far, we posted some of our images here in this sub or here in full resolution .

One thing to keep in mind is that normal cameras block most of the infrared light, which makes it unsuitable for shooting hydrogen nebulae. That's a minor reason why we eventually chose a Fuji camera, as they filter a bit less infrared than other brands.

In the end the biggest impact makes the lens/telescope. After a lot of research we chose the Samyang/ Rokinon 135mm f2.0 lens. Also we found it very rewarding shooting with such a 'small' focal length because it forgives minor inaccuracies while giving very good results.

For us the biggest reasons for this hobby are to experience the night sky with our own equipment and learning very much (about physics, processing the data, cameras, ...). Both things can be achieved with modest equipment and I would keep that in mind when comparing own images with others. Also I personally love the challenge to get the best possible results with things you already have.

Hope that helped a bit.

[–] [email protected] 7 points 1 month ago

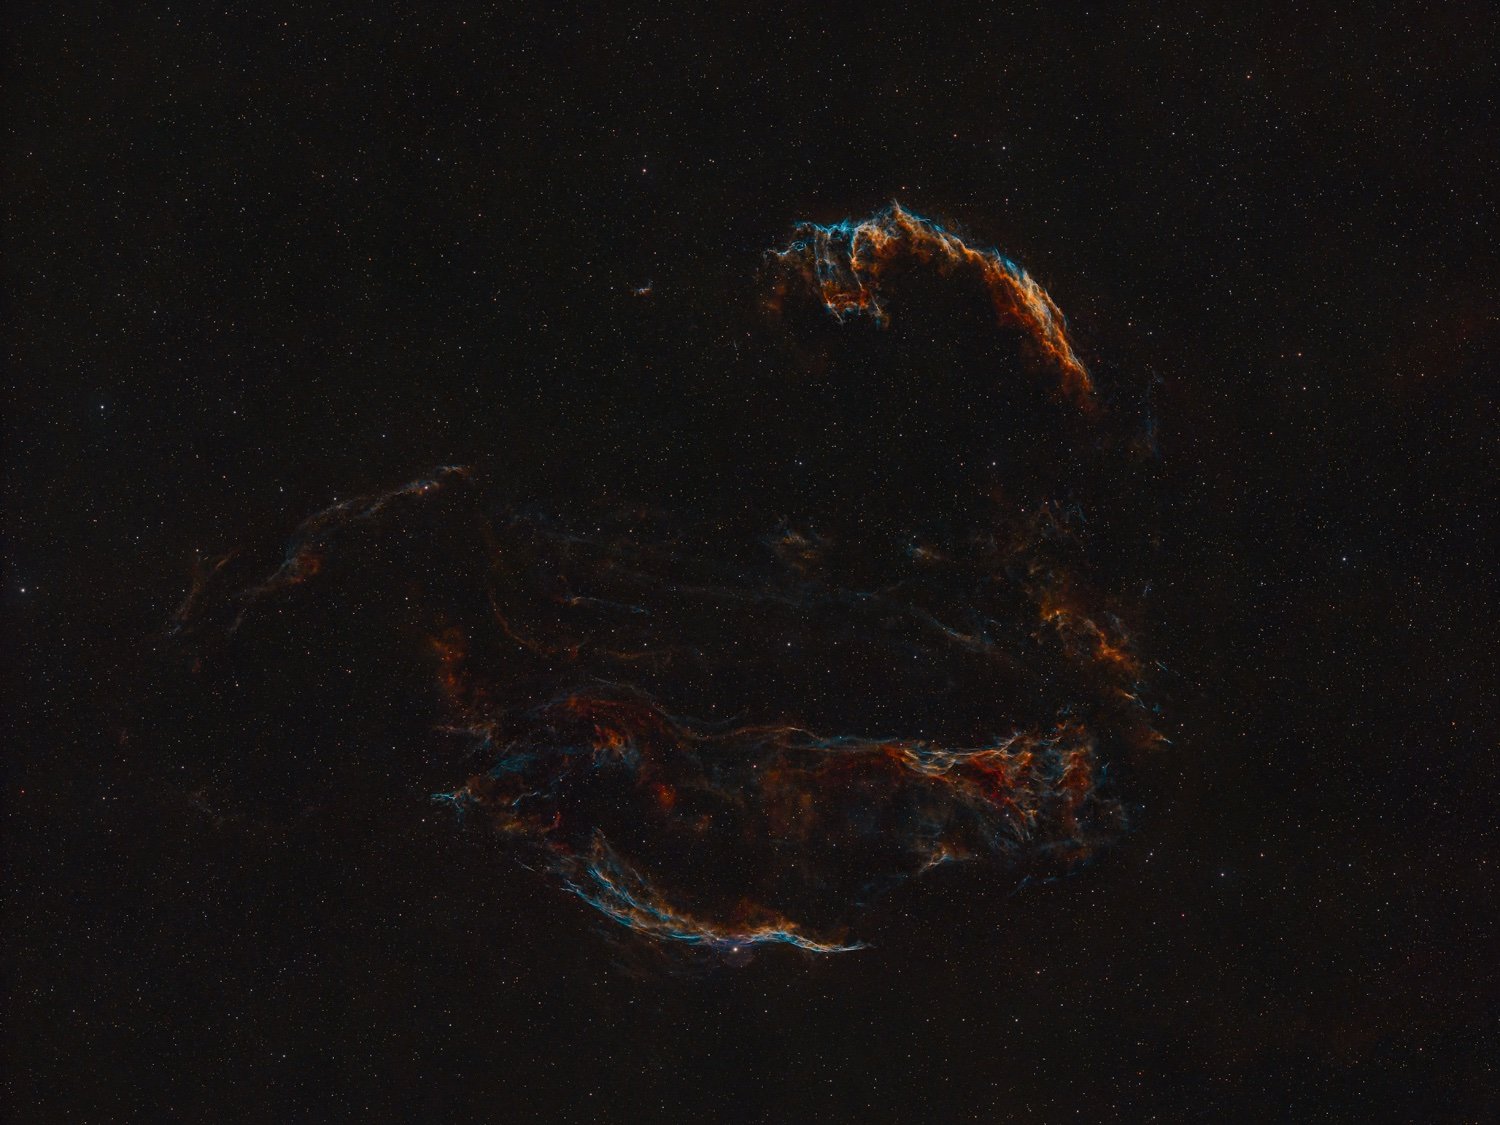
Full resolution image and more details here

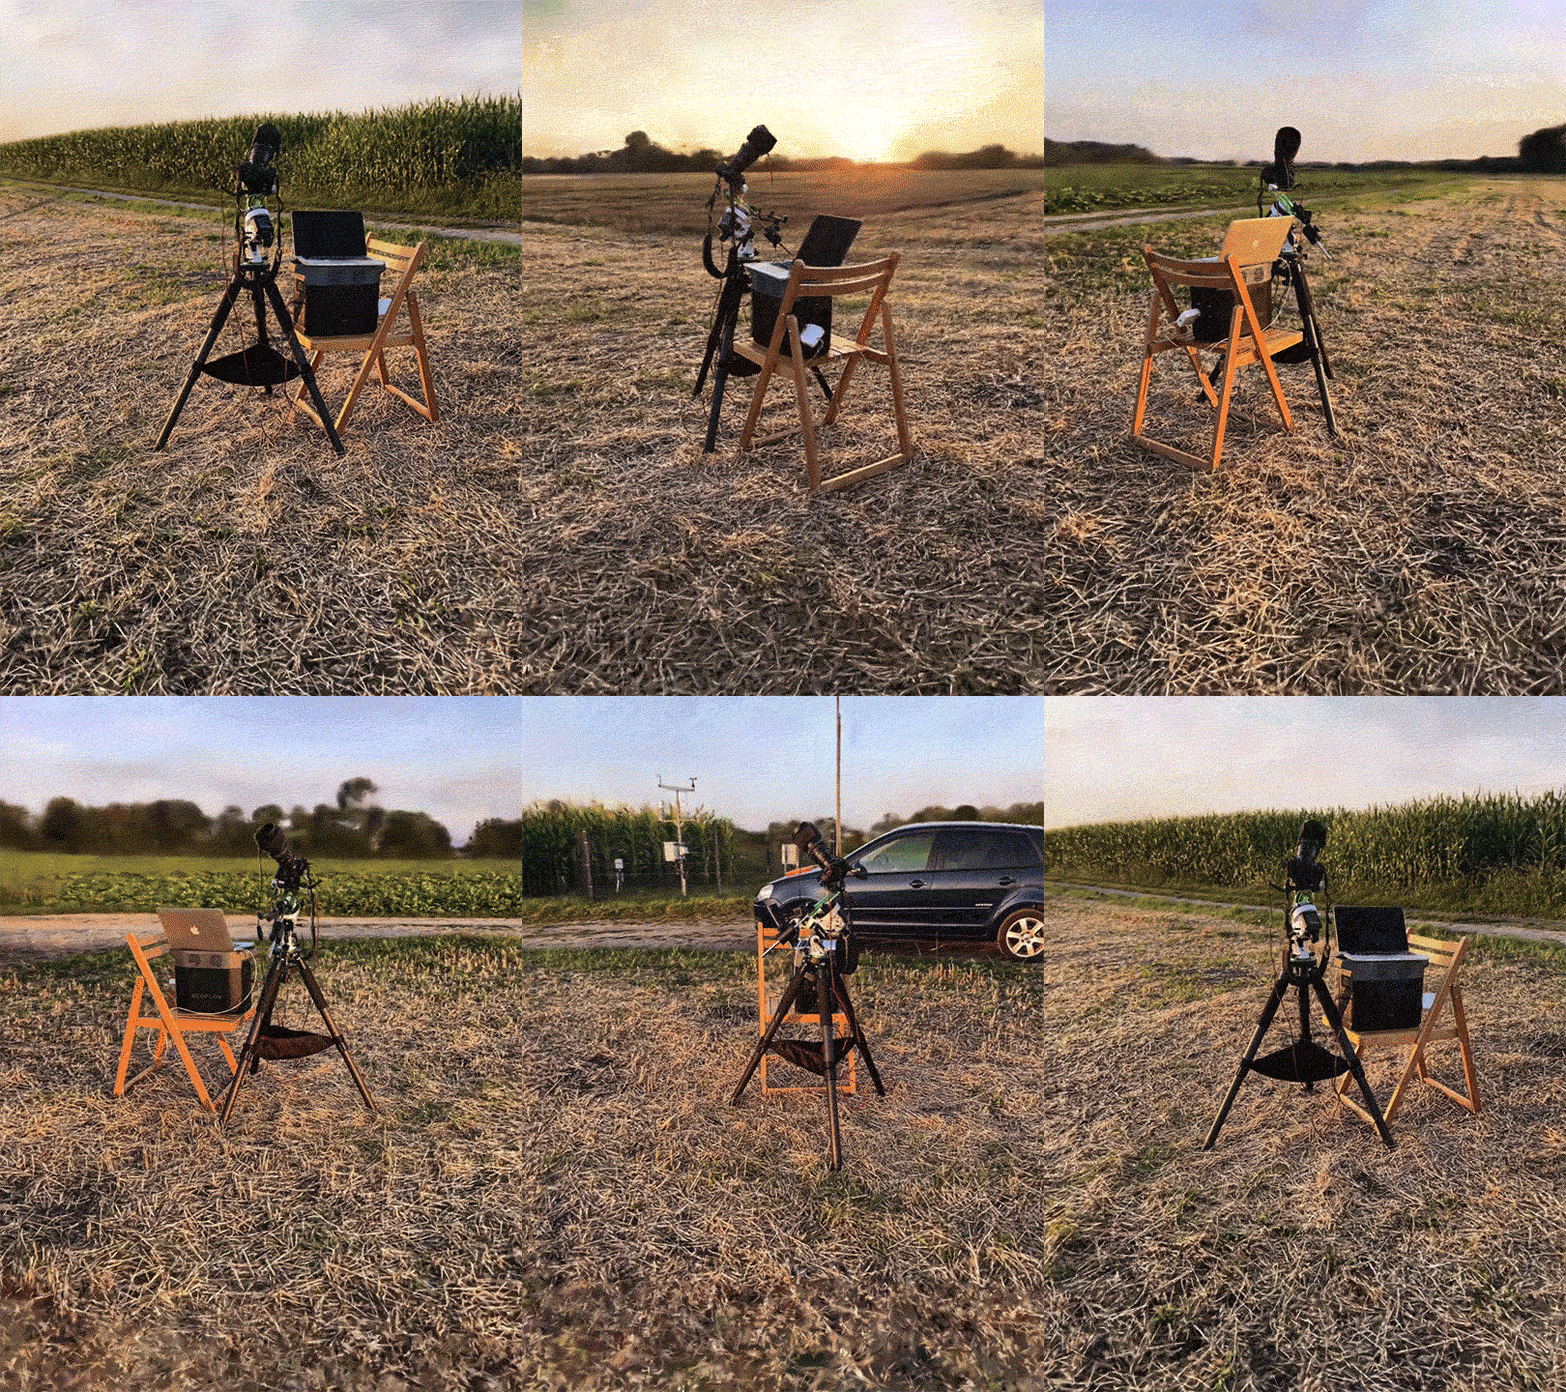
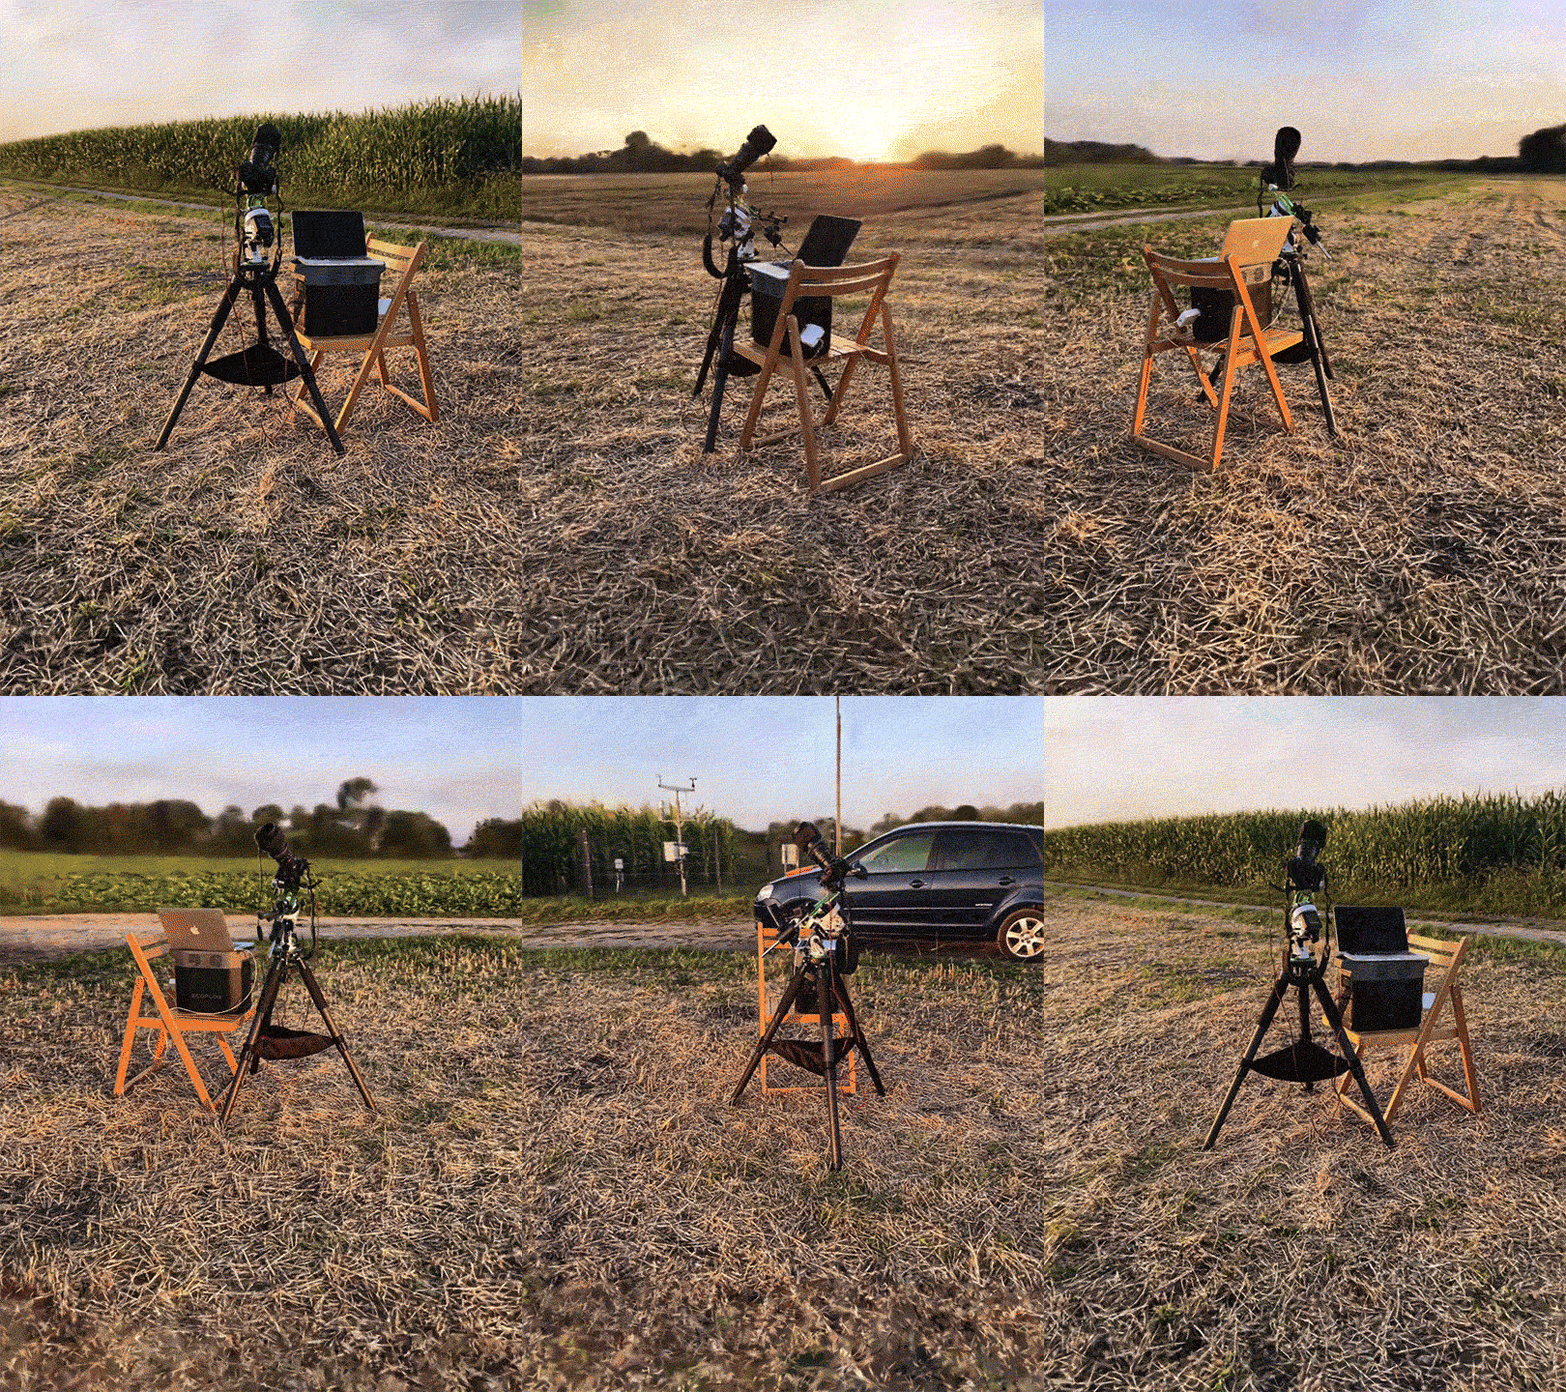
Also this is what our setup looks like to shoot such an image:


We shoot this image over two nights to reveal the faint structures of the veil nebula complex.

Shot with a 135mm lens and a Fuji X-T5.

30
Veil nebula complex (lemmy.world)
submitted 1 month ago* (last edited 1 month ago) by [email protected] to c/[email protected]
 

We finally got two clear nights and although the moon was really bright, this target came out quite well due to the narrowband filter.

Equipment:

  • Samyang 135mm f2.0
  • Fuji X-T5
  • Star Adventurer 2i
  • Duo narrowband filter

Images:

  • 466 x 60s lights
  • ISO 3200
  • @f2.8

Editing:

  • Stacking with drizzle in Siril
  • Background removal in GraXpert
  • photometric color calibration in Siril
  • BlurXTerminator
  • 0.3 denoising with BlurXTerminator
  • Star removal
  • Stretching in Siril with GHST
  • final composing in Photoshop (saturation, contrast, blending with stars)

Full resolution and more details: https://telescopius.com/pictures/view/198606/deep_sky/ngc-6974/veil-nebula-complex/by-maxi_franzi

124
submitted 2 months ago* (last edited 2 months ago) by [email protected] to c/[email protected]
 

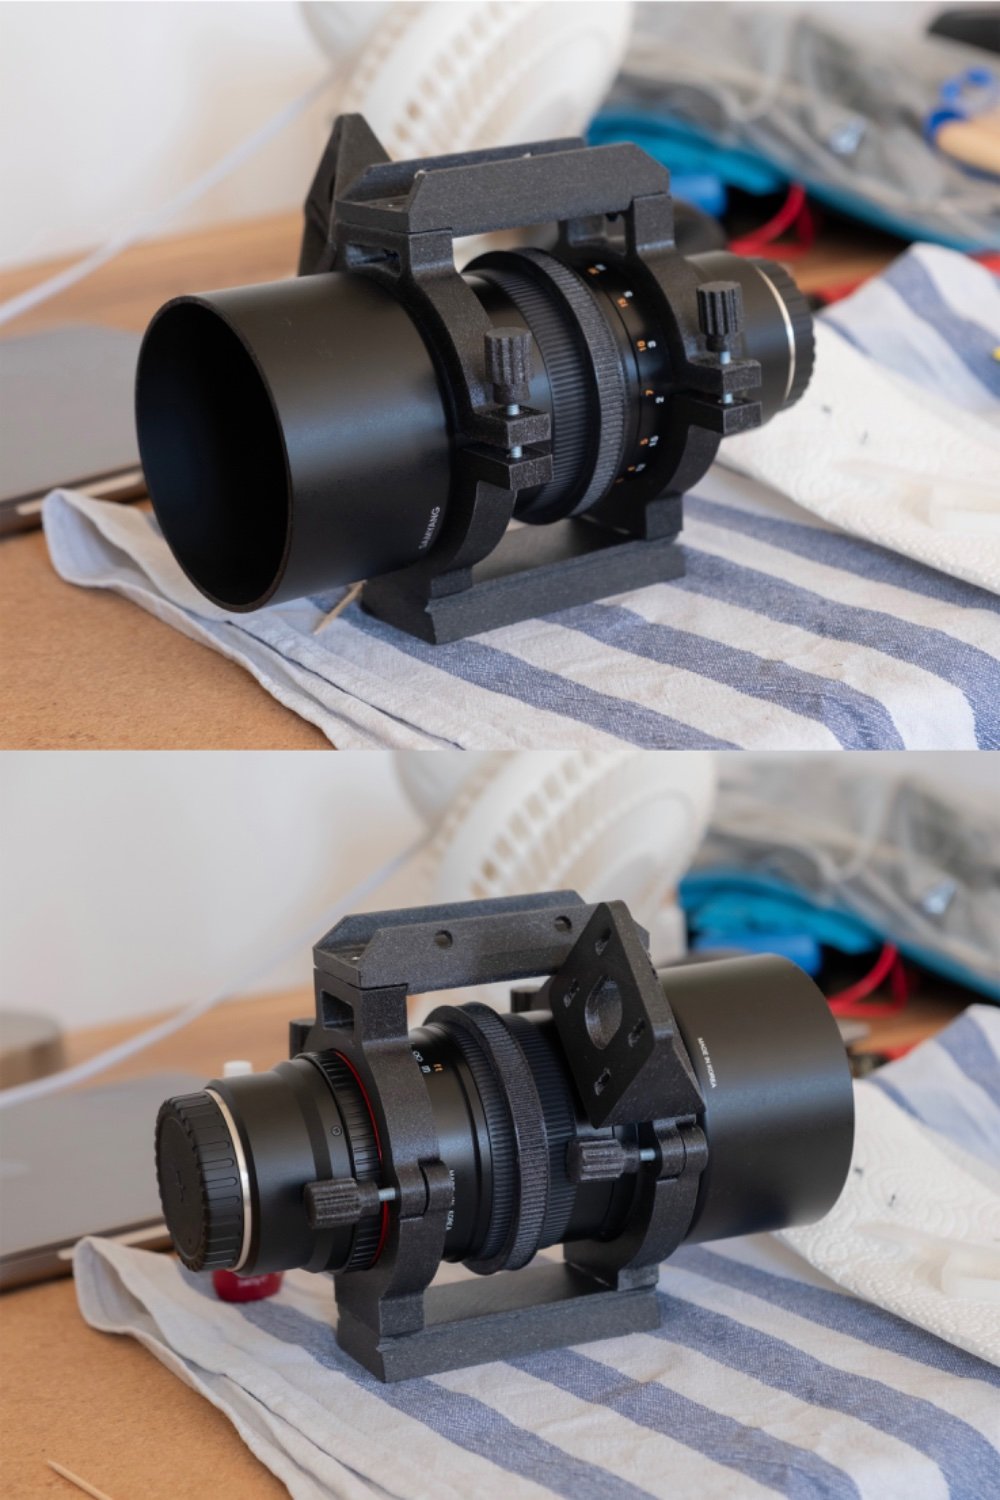
I found this design and it fitted my need perfectly. It is a mount for a very popular camera lens used in astrophotography. It not only functions as a weight relief for the camera but also allows to rotate the field of view. Moreover it is possible to focus the lens with the installation of a stepper motor, which will be the next step.

The single parts are screwed together with the help of threaded heat inserts. Just to make sure they are also glued together with epoxy, as the mount really needs to hold up. The screws are locked with Loctite.

Edit: Link to the mount (not my design): https://www.thingiverse.com/thing:6099113

50
M31 (lemmy.world)
submitted 2 months ago* (last edited 2 months ago) by [email protected] to c/[email protected]
 

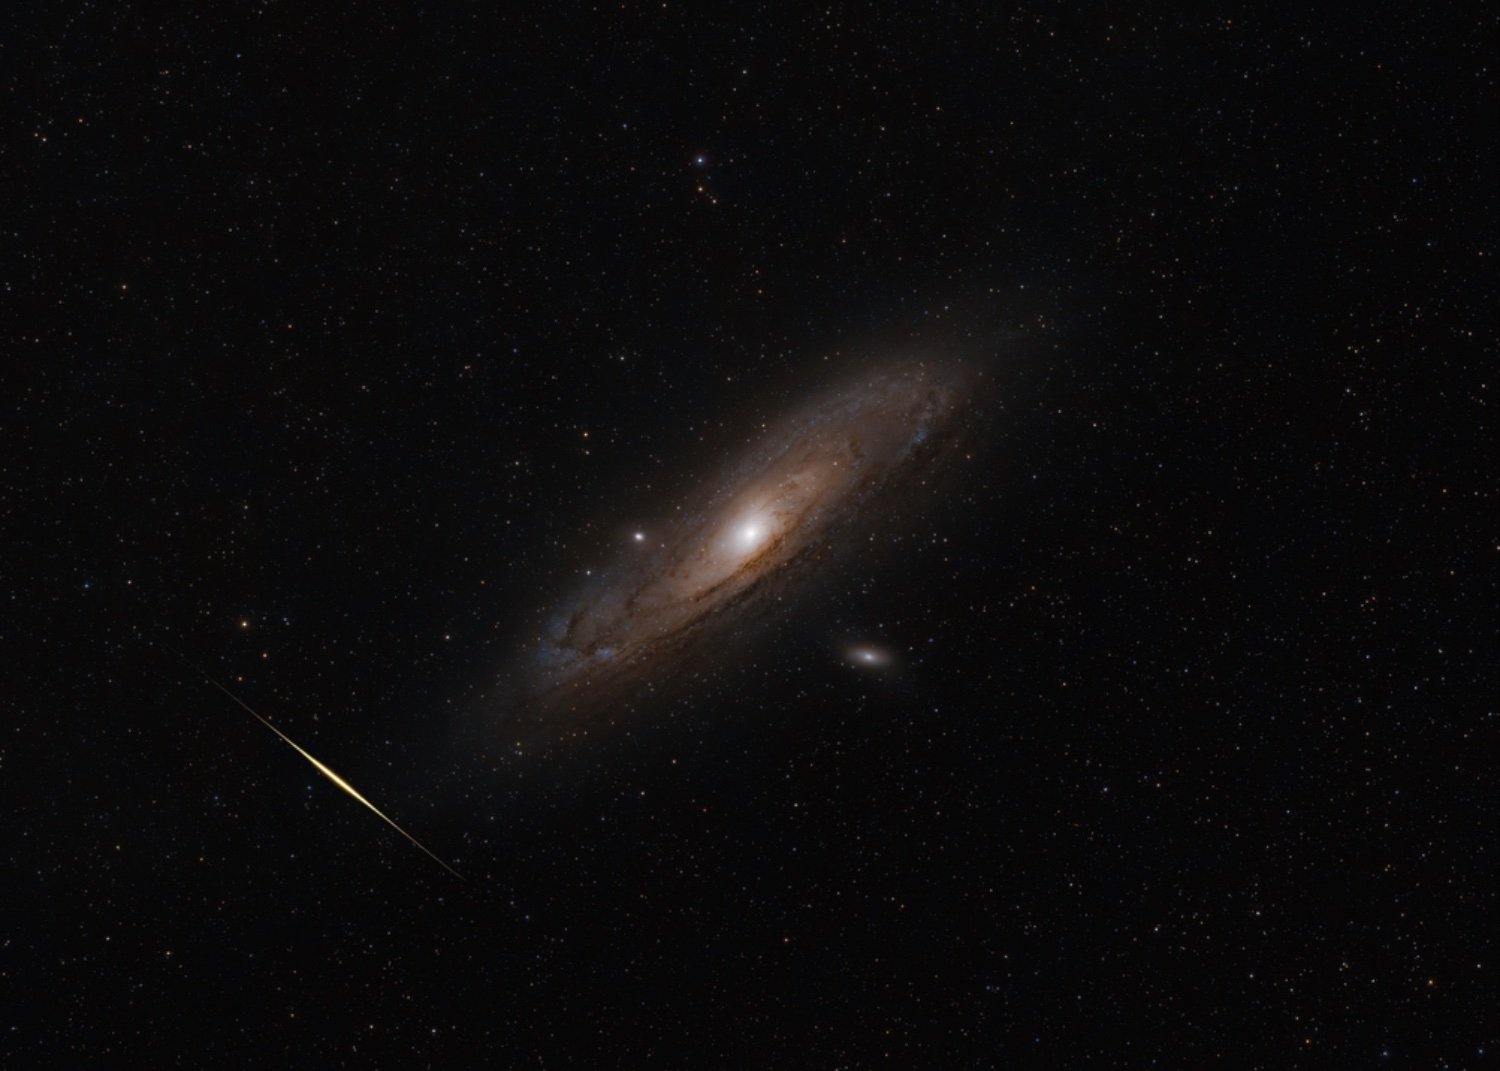
~~We got a lucky shot of Andromeda with a meteor crossing our view.~~ Apparently we shot a satellite flare next to Andromeda.

Images:

  • Samyang 135mm @2.8
  • Fuji X-T5
  • Star Adventurer 2i
  • 465 x 30s
  • ISO 200

Processing:

  • stacking, stretching, background extraction and star separation in Siril
  • final composition in Photoshop
29
submitted 3 months ago* (last edited 3 months ago) by [email protected] to c/[email protected]
 

Although the seeing was not great we managed to get our first shot of the region around Sadr.

Equipment:

  • Samyang 135mm
  • Fuji X-T5
  • Star Adventurer 2i
  • STC Clip In filter (multi narrowband)

Images:

  • 296x 30s
  • ISO 800
  • f2.0

Editing:

  • stacking and stretching in Siril
  • BXT
  • gradient removal and denoise in Graxpert
  • final editing in PS

Full resolution and more infos: https://telescopius.com/pictures/view/192523/deep_sky/crescent-nebula/NGC/6888/diffuse-nebula/by-maxi_franzi

21
M16 Eagle Nebula (lemmy.world)
submitted 3 months ago* (last edited 3 months ago) by [email protected] to c/[email protected]
 

Equipment:

  • Samyang 135mm
  • Fuji X-T5 (unmodified)
  • Star Adventurer 2i
  • STC Clip In Filter

Images:

  • 318 x 30s
  • ISO 800
  • f2.0

Editing:

  • Siril for stacking and stretching
  • Graxpert Background removal & denoise
  • BXT
  • Photoshop for final editing

Full resolution and more info: https://telescopius.com/pictures/view/192387/deep_sky/omega-or-swan-nebula/M/17/diffuse-nebula/by-maxi_franzi

102
M51 (lemmy.world)
 

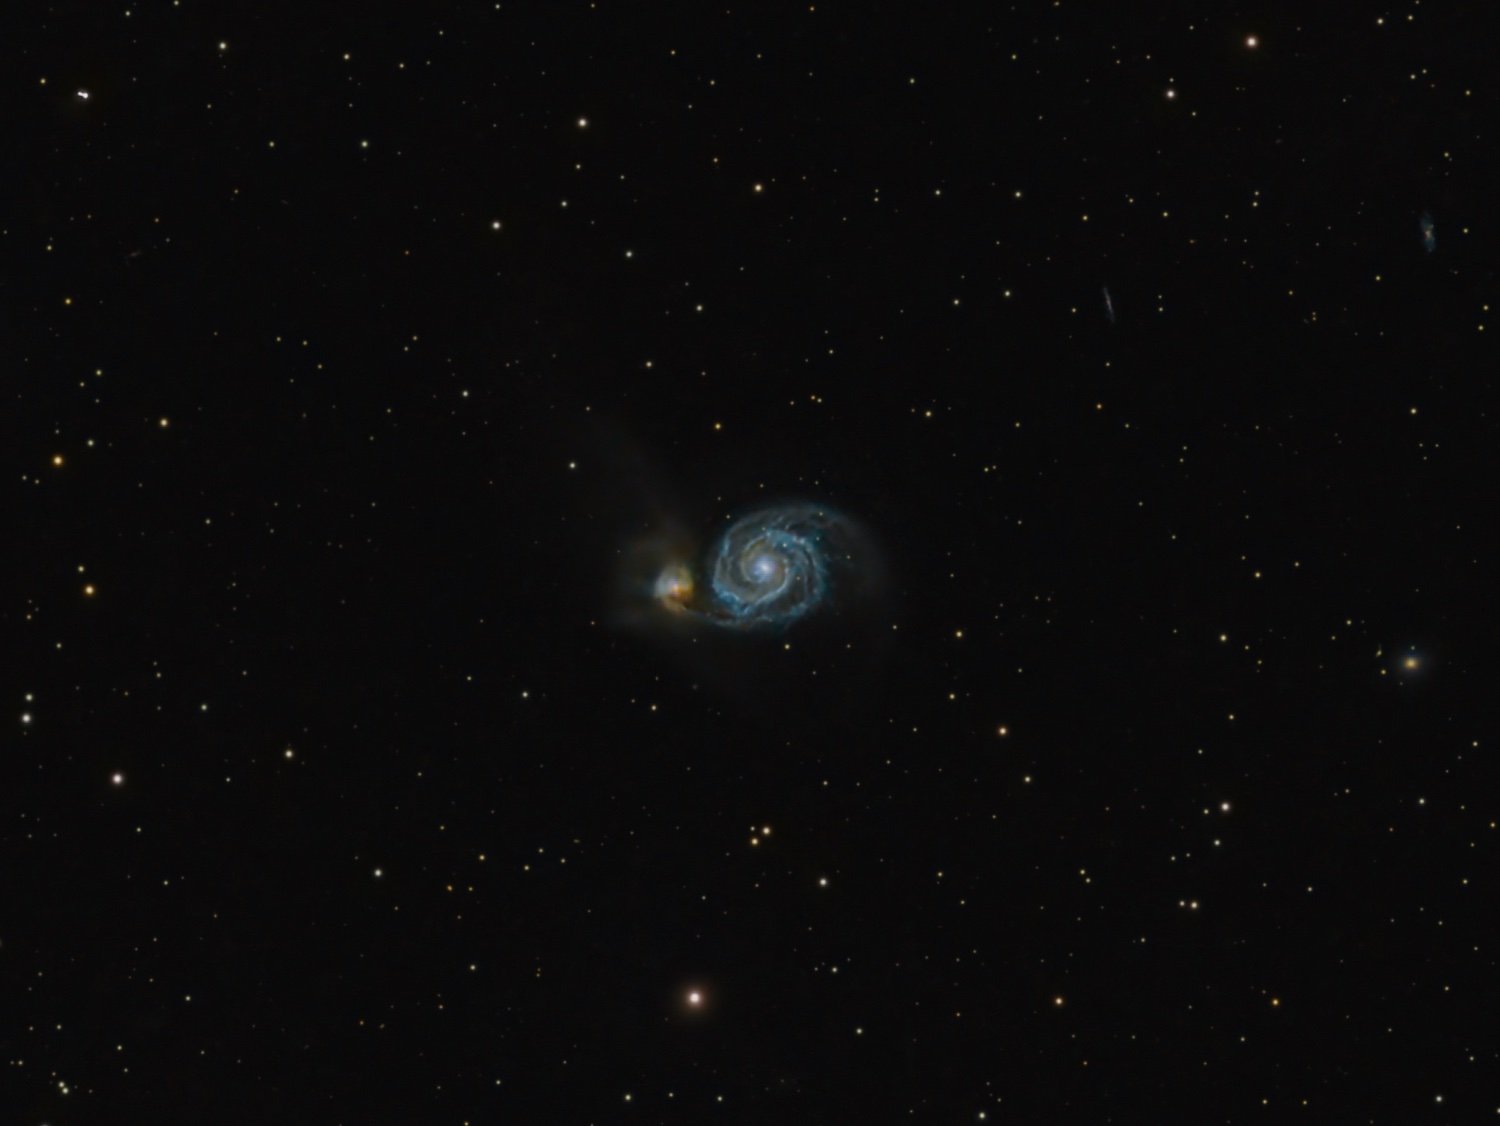
Whirlpool galaxy shot at 135mm.

Equipment:

  • Samyang 135mm f2.0
  • Fuji X-T5

Images:

  • 723 x 60s
  • ISO 400

Full resolution: https://telescopius.com/pictures/view/188842/deep_sky/whirlpool-galaxy/M/51/galaxy/by-maxi_franzi


Wide field shot of the virgo cluster.

Equipment:

  • Samyang 135mm
  • Fuji X-T5
  • Star Adventurer 2i

Images:

  • 387 x 30s
  • ISO 400
  • f2.0

Full resolution and more info: https://telescopius.com/pictures/view/188443/deep_sky/markarian-chain/galaxy/by-maxi_franzi

view more: next ›