v1605

joined 1 year ago
MODERATOR OF
[–] [email protected] 1 points 8 hours ago

Thanks! Besides some other posts about this adapter on and some comments here and there on Reddit, I just post on Lemmy now.

[–] [email protected] 2 points 1 week ago (1 children)

Not sure, no mention about it on his discord. Though with the new SD2SP2 V2.0 design the m.2 is less important (supposedly it has similar performance).

[–] [email protected] 21 points 1 week ago (3 children)
[–] [email protected] 5 points 2 weeks ago

Could you imagine if land voted instead of people?

Land Doesn't Vote

[–] [email protected] 1 points 2 weeks ago

Well thanks for giving it a second look lol

[–] [email protected] 6 points 2 weeks ago

Here is how I received the console. Before the replacement

25
submitted 2 weeks ago* (last edited 2 weeks ago) by [email protected] to c/[email protected]
 

This was my first attempt doing a trace repair on a HDMI port. Seems like everything seems to be working after replacing those caps as well. Played through the tutorial of gears 5 with no issues.

What I've tested:

  1. Playing downloaded game
  2. Playing a Blu-ray
  3. Playing on a 4k TV and 1440 monitor. This one the auto detect preferred 120hz 1080p but manually selecting resolution works great.

What I've learned:

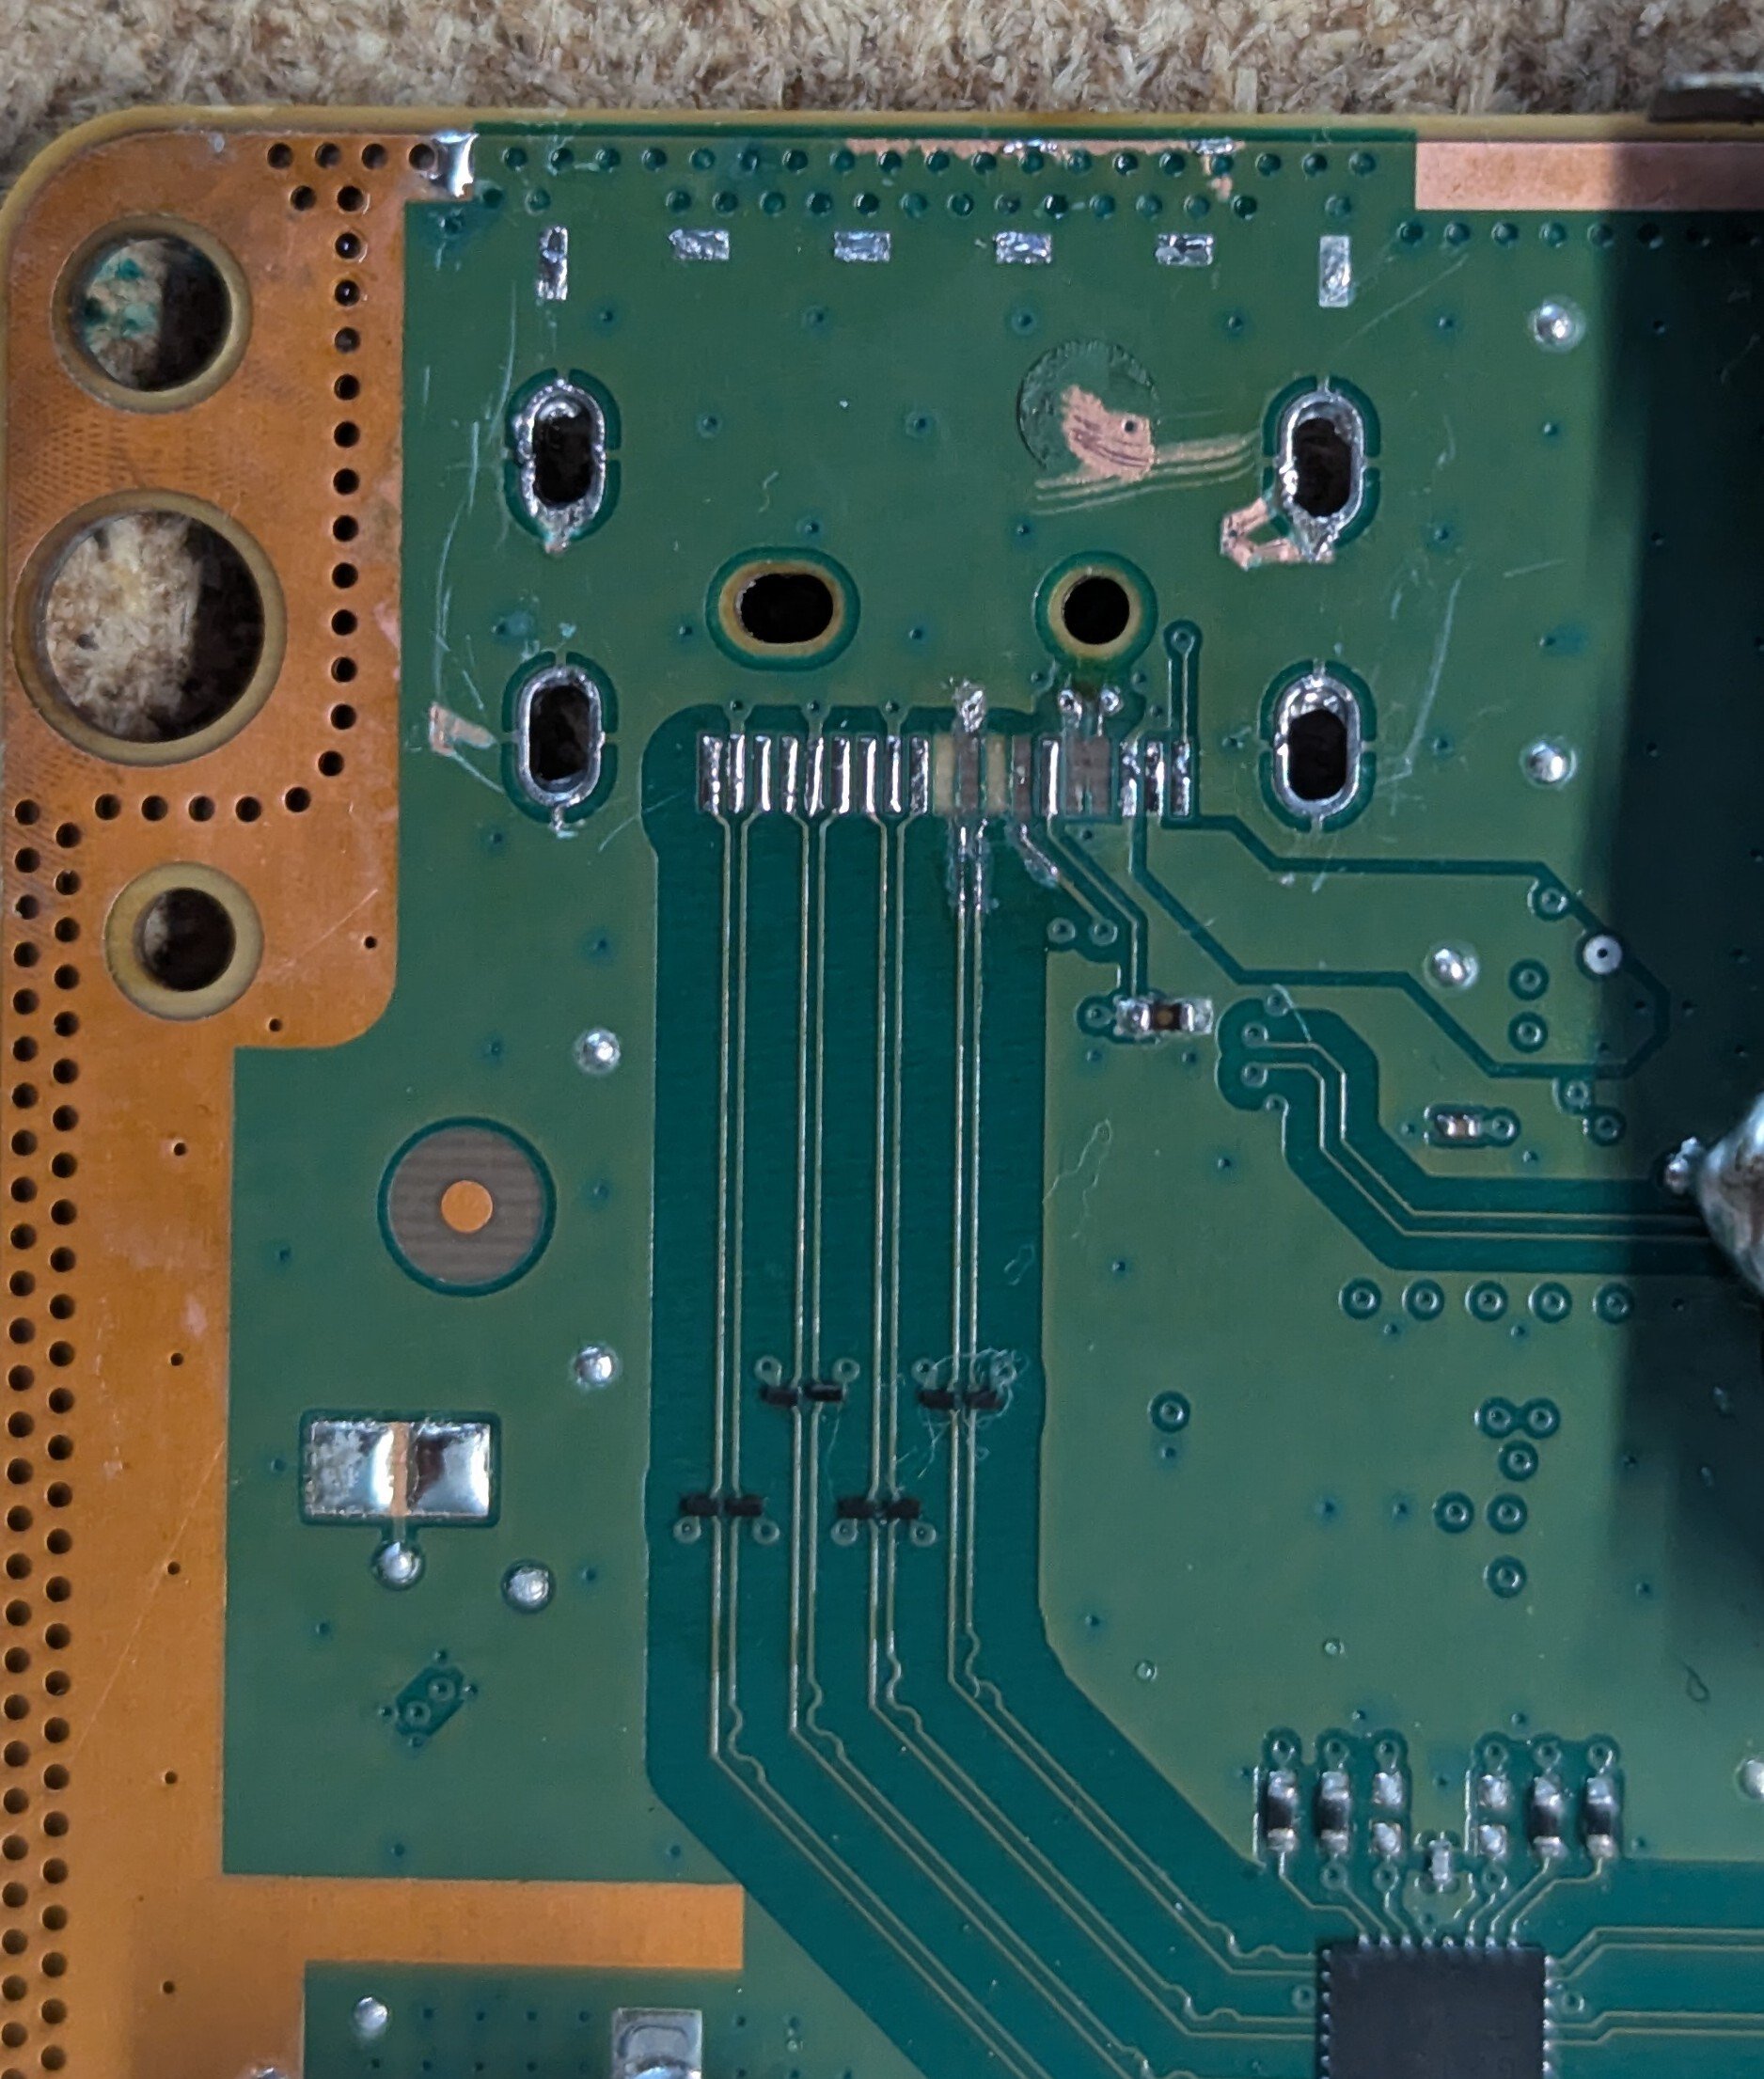
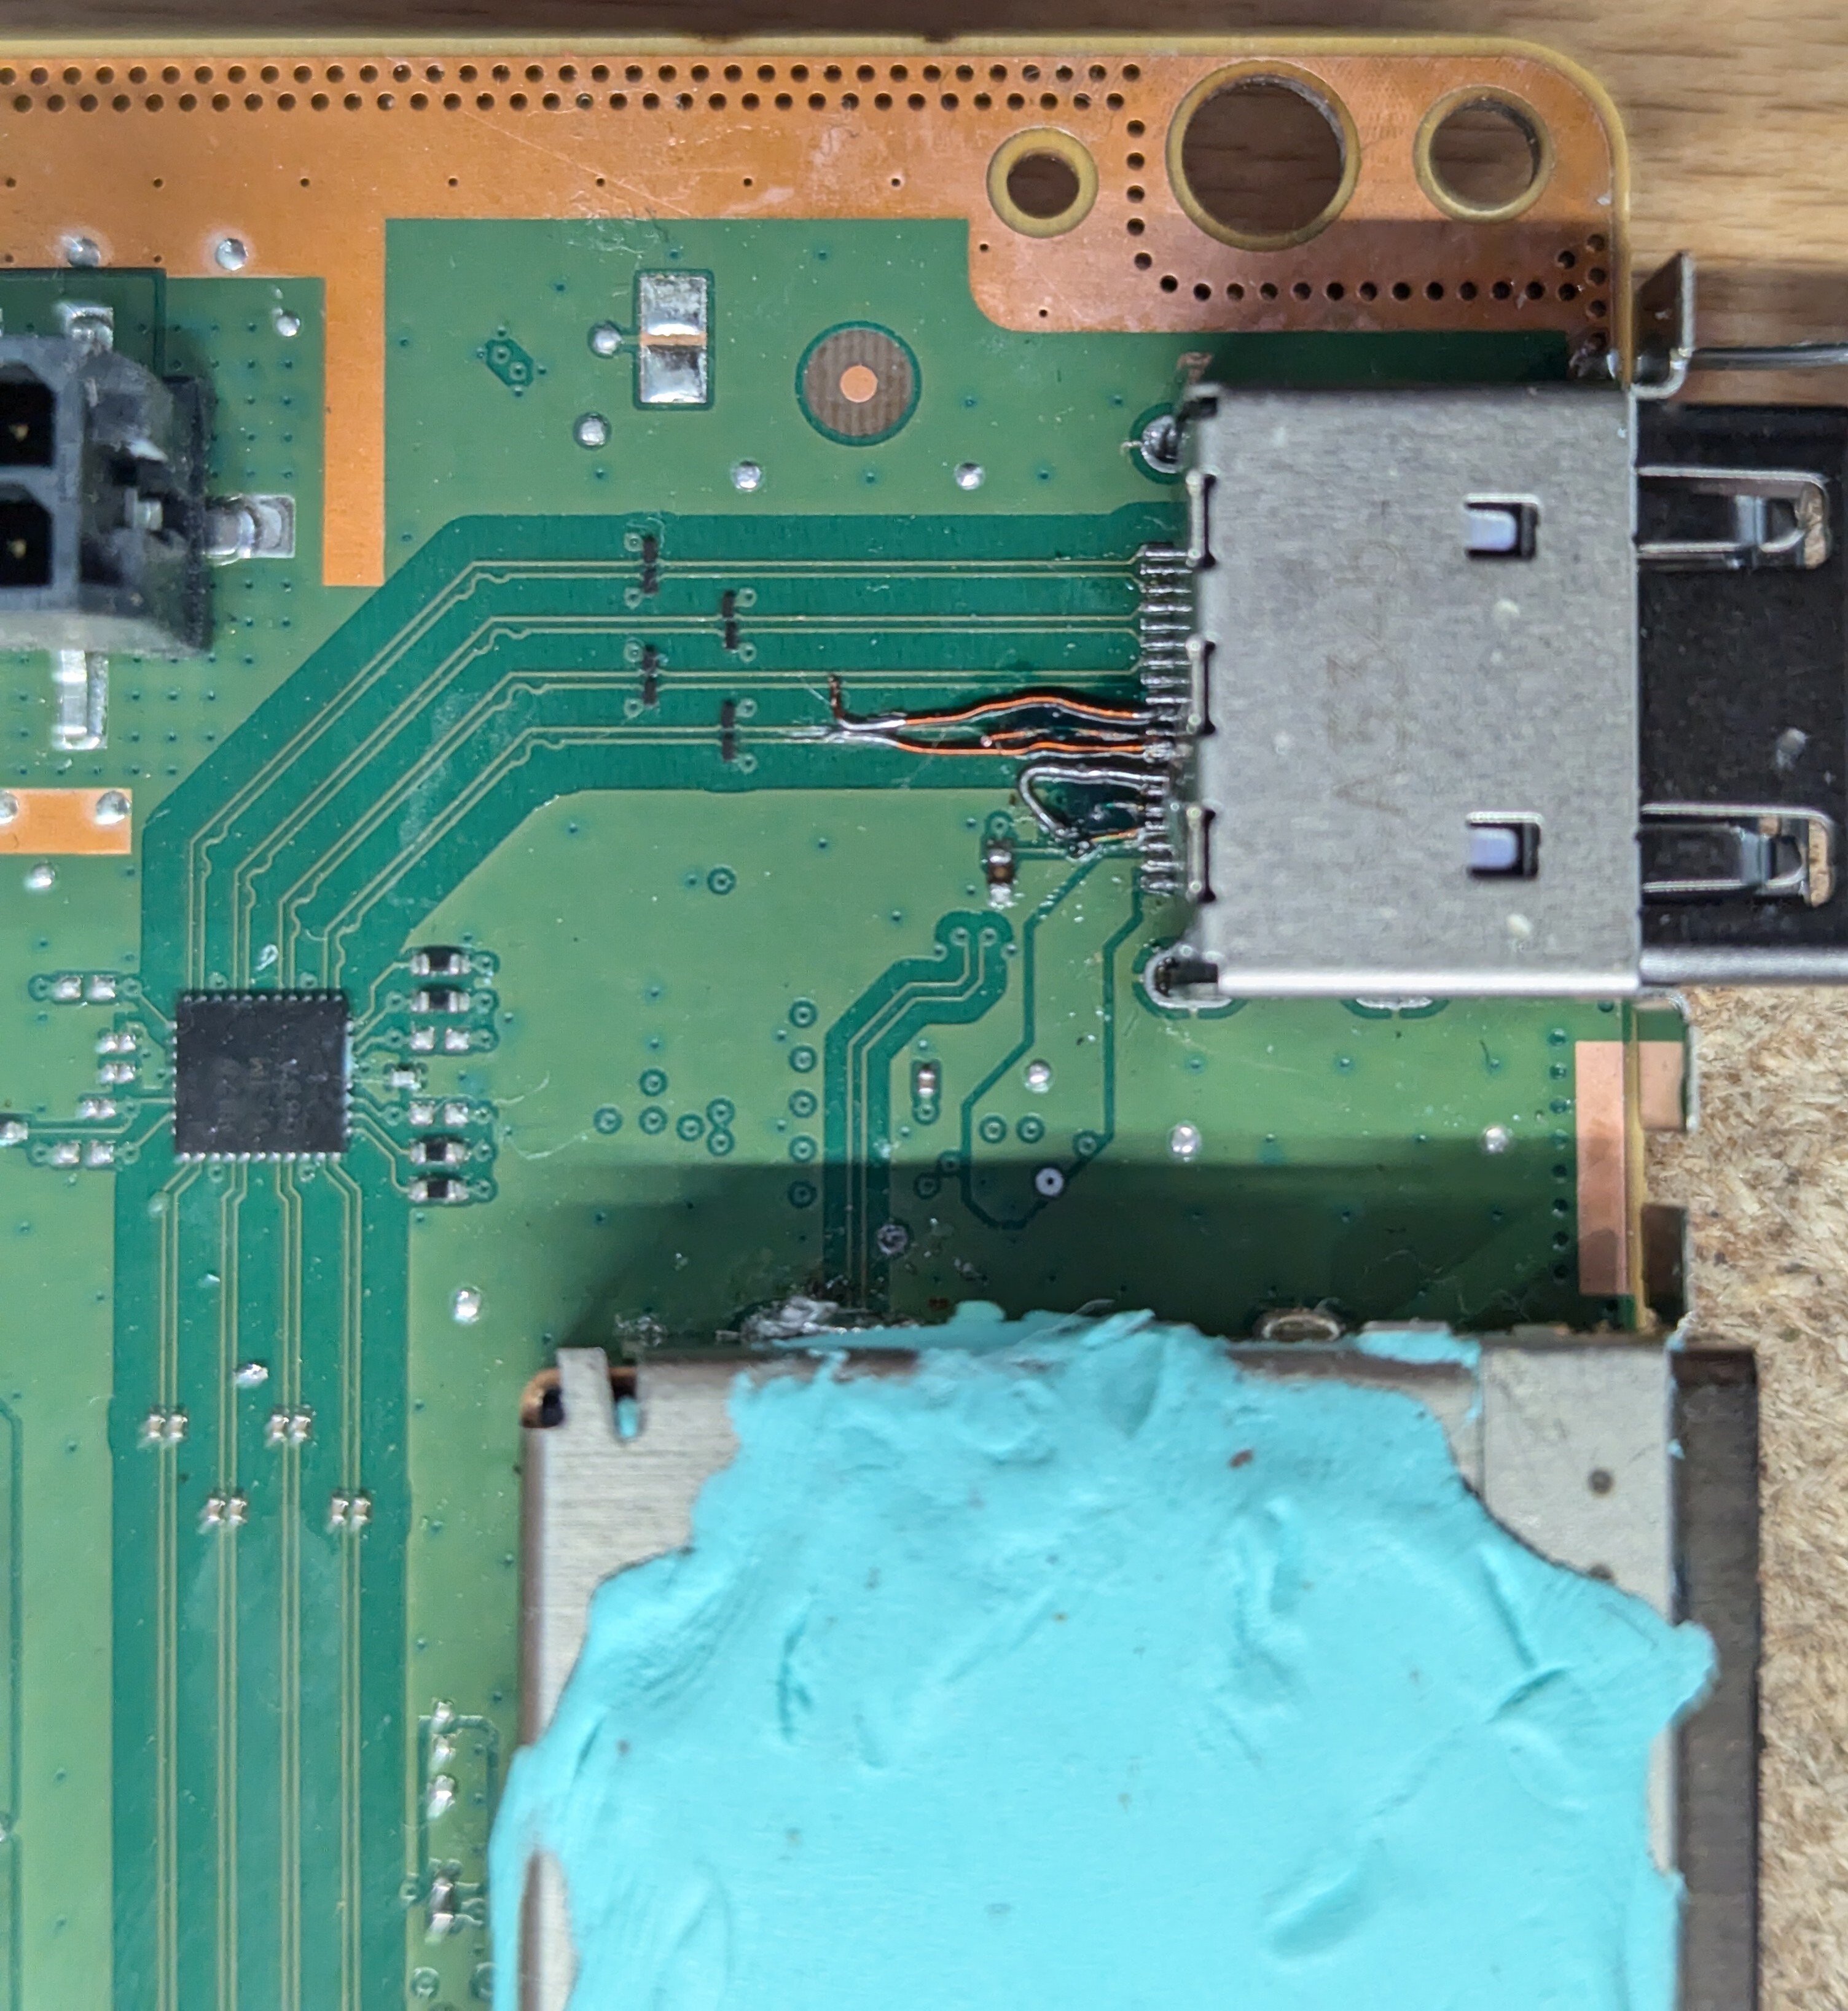
  1. Wired all the pads before soldering the port. I attached the front wires after the port was soldered. Should have just done them all.
  2. A cheap grinding pen is so much easier to use than a knife to expose the traces.
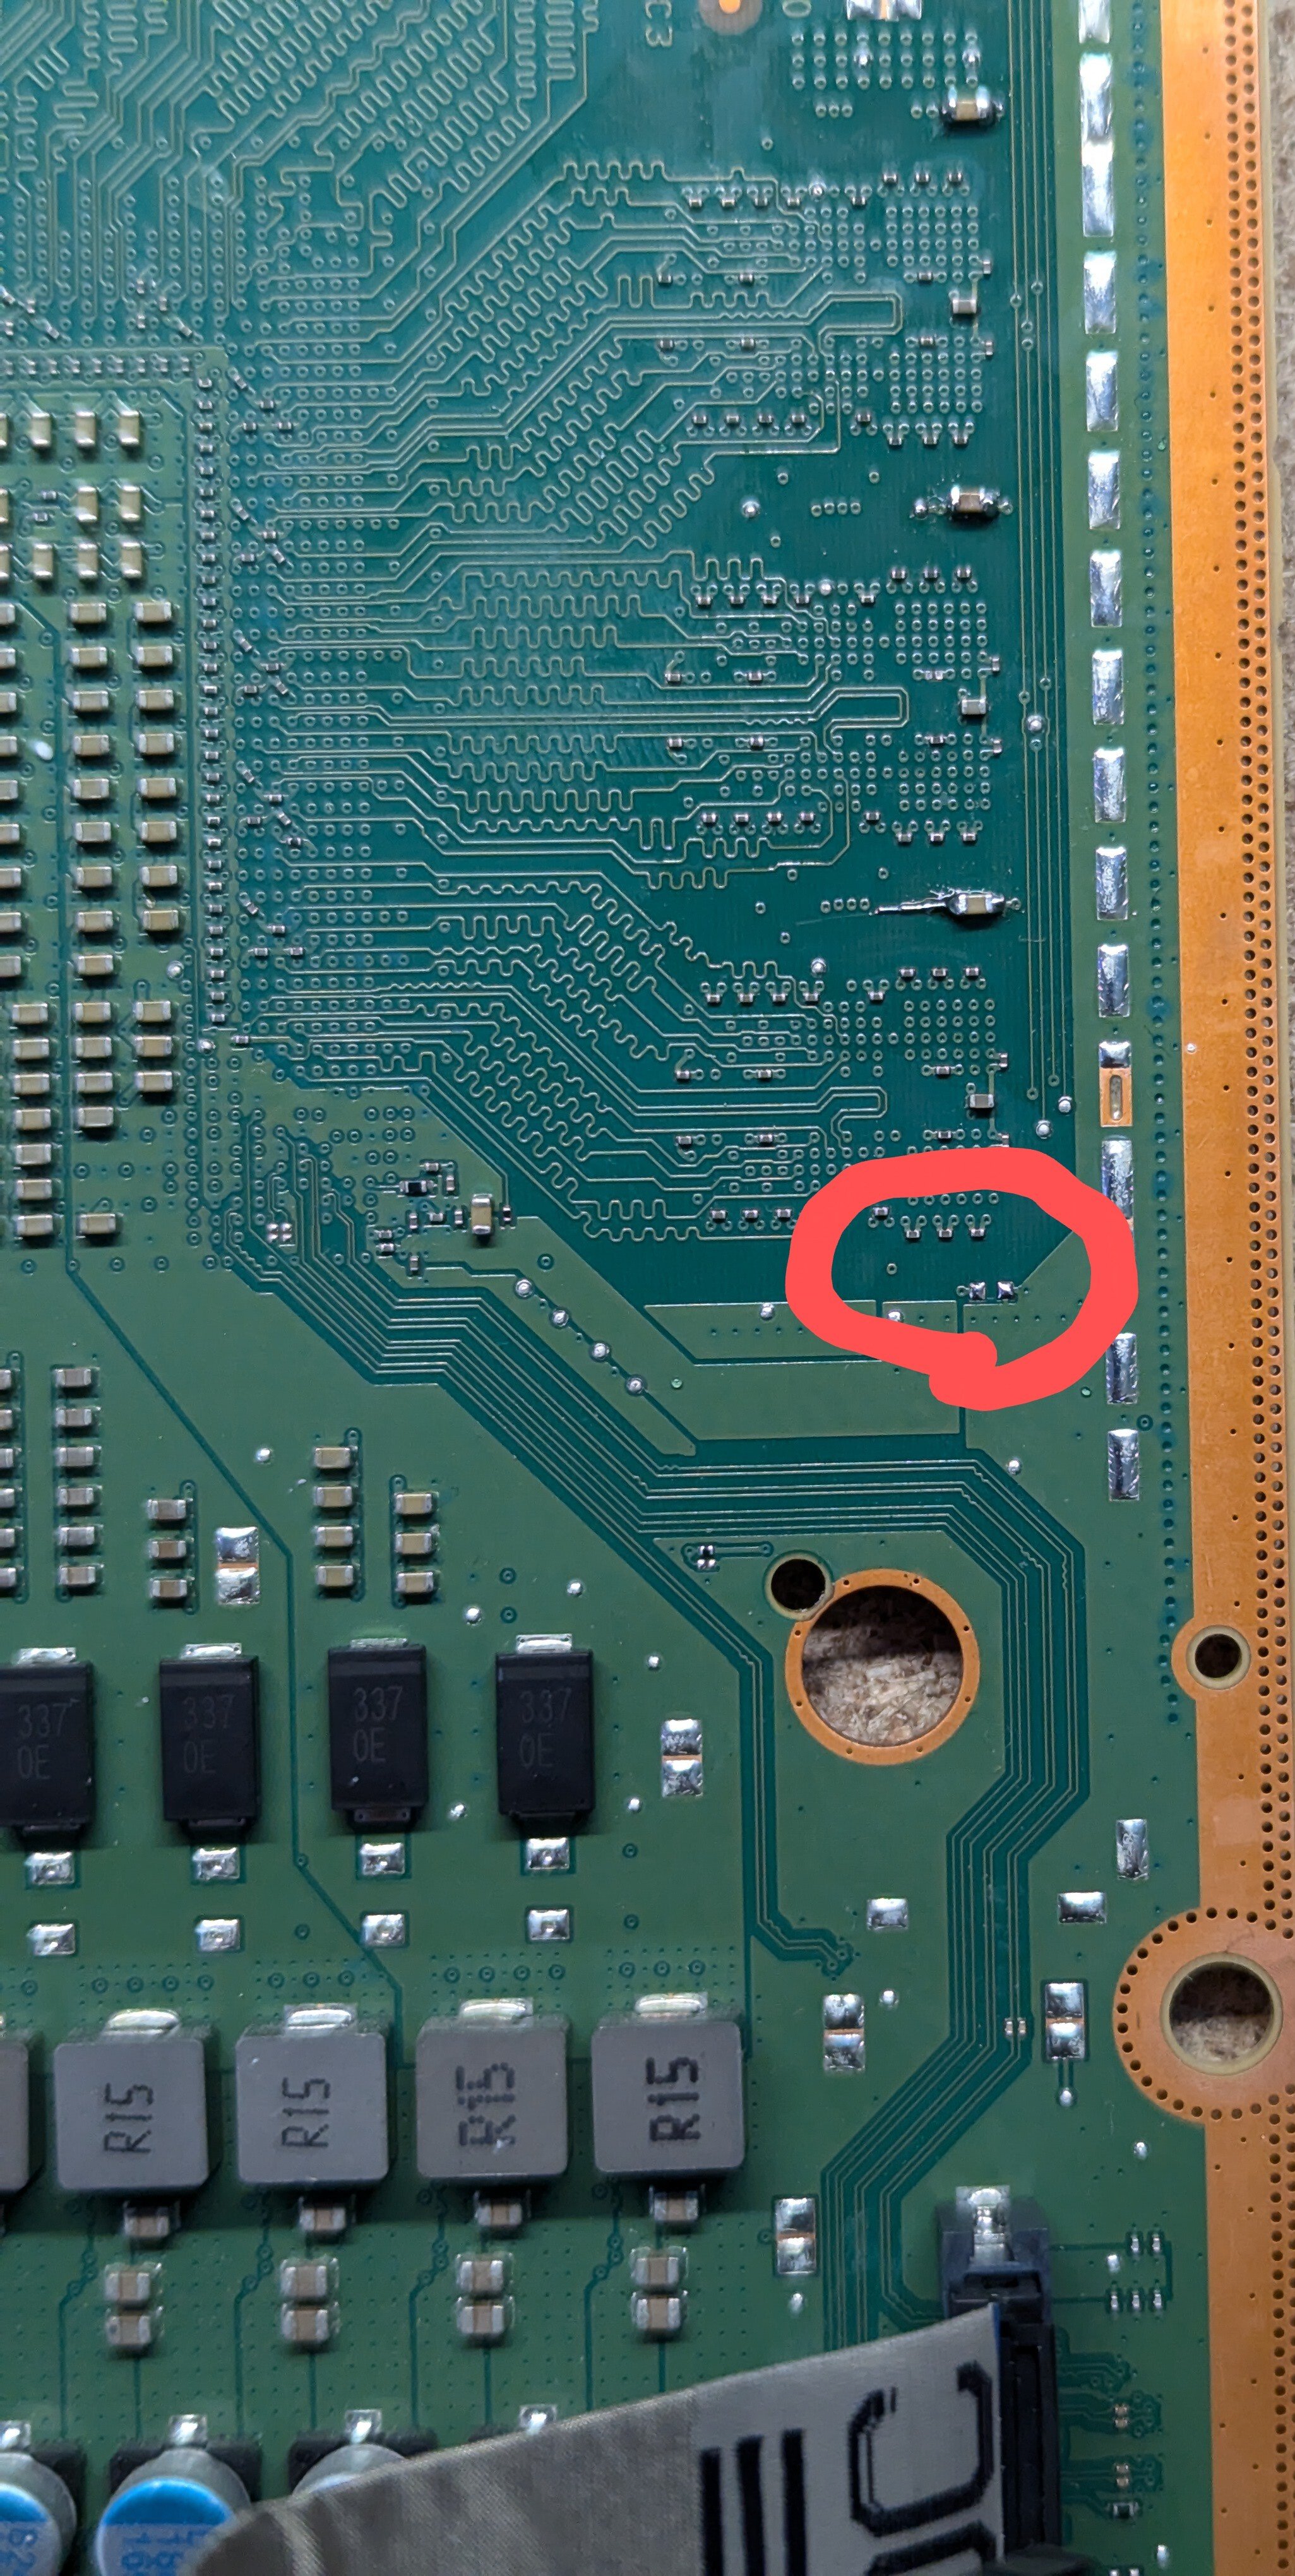
  3. 0201 are very hard to work with.
[–] [email protected] 3 points 3 weeks ago

Yeah that makes sense, Microsoft is definitely going to keep costs down and not switch out those reels. Based on the other info, these are 22uf 20%, so in spec with the others I've measured.

[–] [email protected] 9 points 3 weeks ago

Luckily all the c17x are 0603 22uf, 20% caps. Thanks for pointing me to the image so I could compare it to the schematics. Now I have to go through and look for others. No idea how this could have even happened.

[–] [email protected] 2 points 3 weeks ago

Good eye, I need to go over the entire board again and look for those. Combined with the other answer that help me with a revision that actually is labeled, you are right. It should be a 22uf 6.3 0603 decoupling cap.


Picked up this Series X to do a trace repair for the hdmi, turns out 2 caps were ripped off the board as well. The one was still partially connected and easy to bodge. The second circled is missing. I'm curious if anyone knows the replacement value.

The similar caps in the area all read between 18.6 to 19.6 uf when out of circuit, so it could be a few values (though no guarantee this cap wasn't unique and completely different).


The 369 in 1 can be reflashed with the Nightrap rom. Funny thing too, the bootleg shell feels higher quality.

[–] [email protected] 2 points 1 month ago

No, for that you still need a real broadband adapter.

4
Another Extender Option (shop.insidegadgets.com)
 

Just another option for people looking to buy a extender (though really consider investing learning how to build one yourself). InsideGadgets is very well known in the community for the GBxCart Flasher and their flash carts so no risks on quality in my opinion.

Disclaimer: I am the developer of the project and have not been compensated in any way from InsideGadgets.


Limited Run Games did preorders last April fools 2023. No actual gameplay, just the movies in quality similar to the GBA video carts.

Rom is 256mb. It doesn't load in the Mister, OpenFPGA, or mGBA.


These are flashcarts
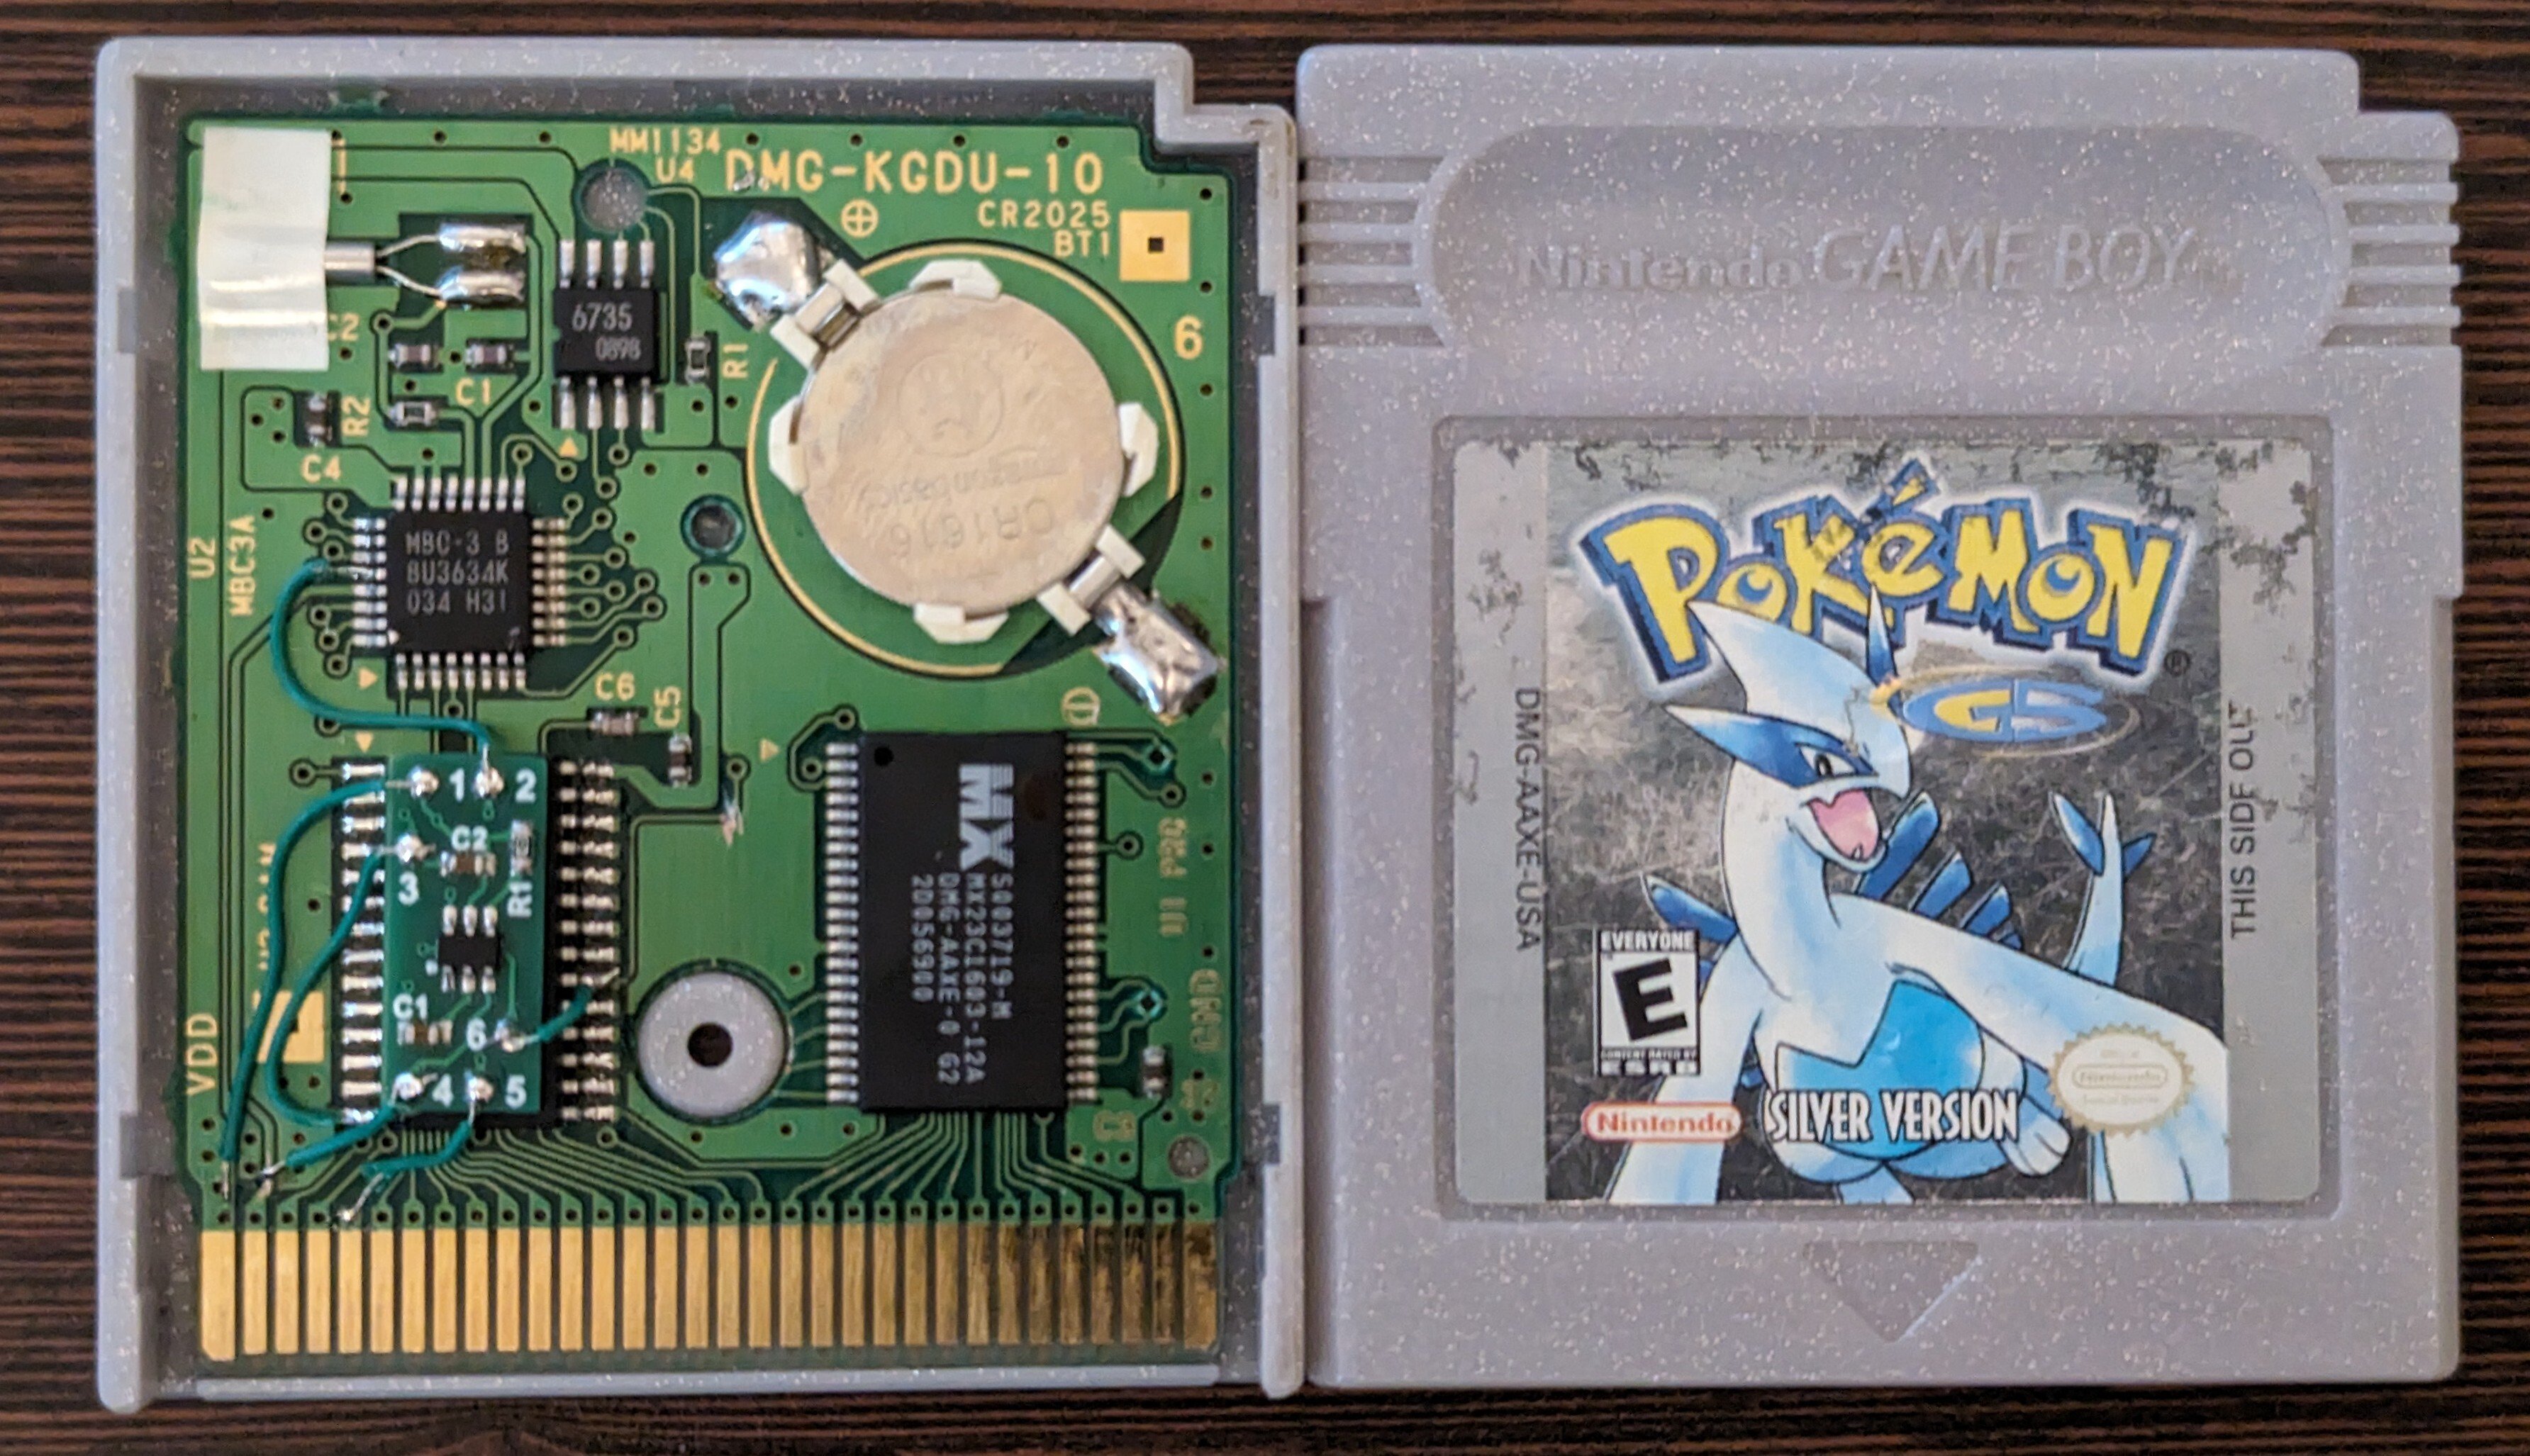
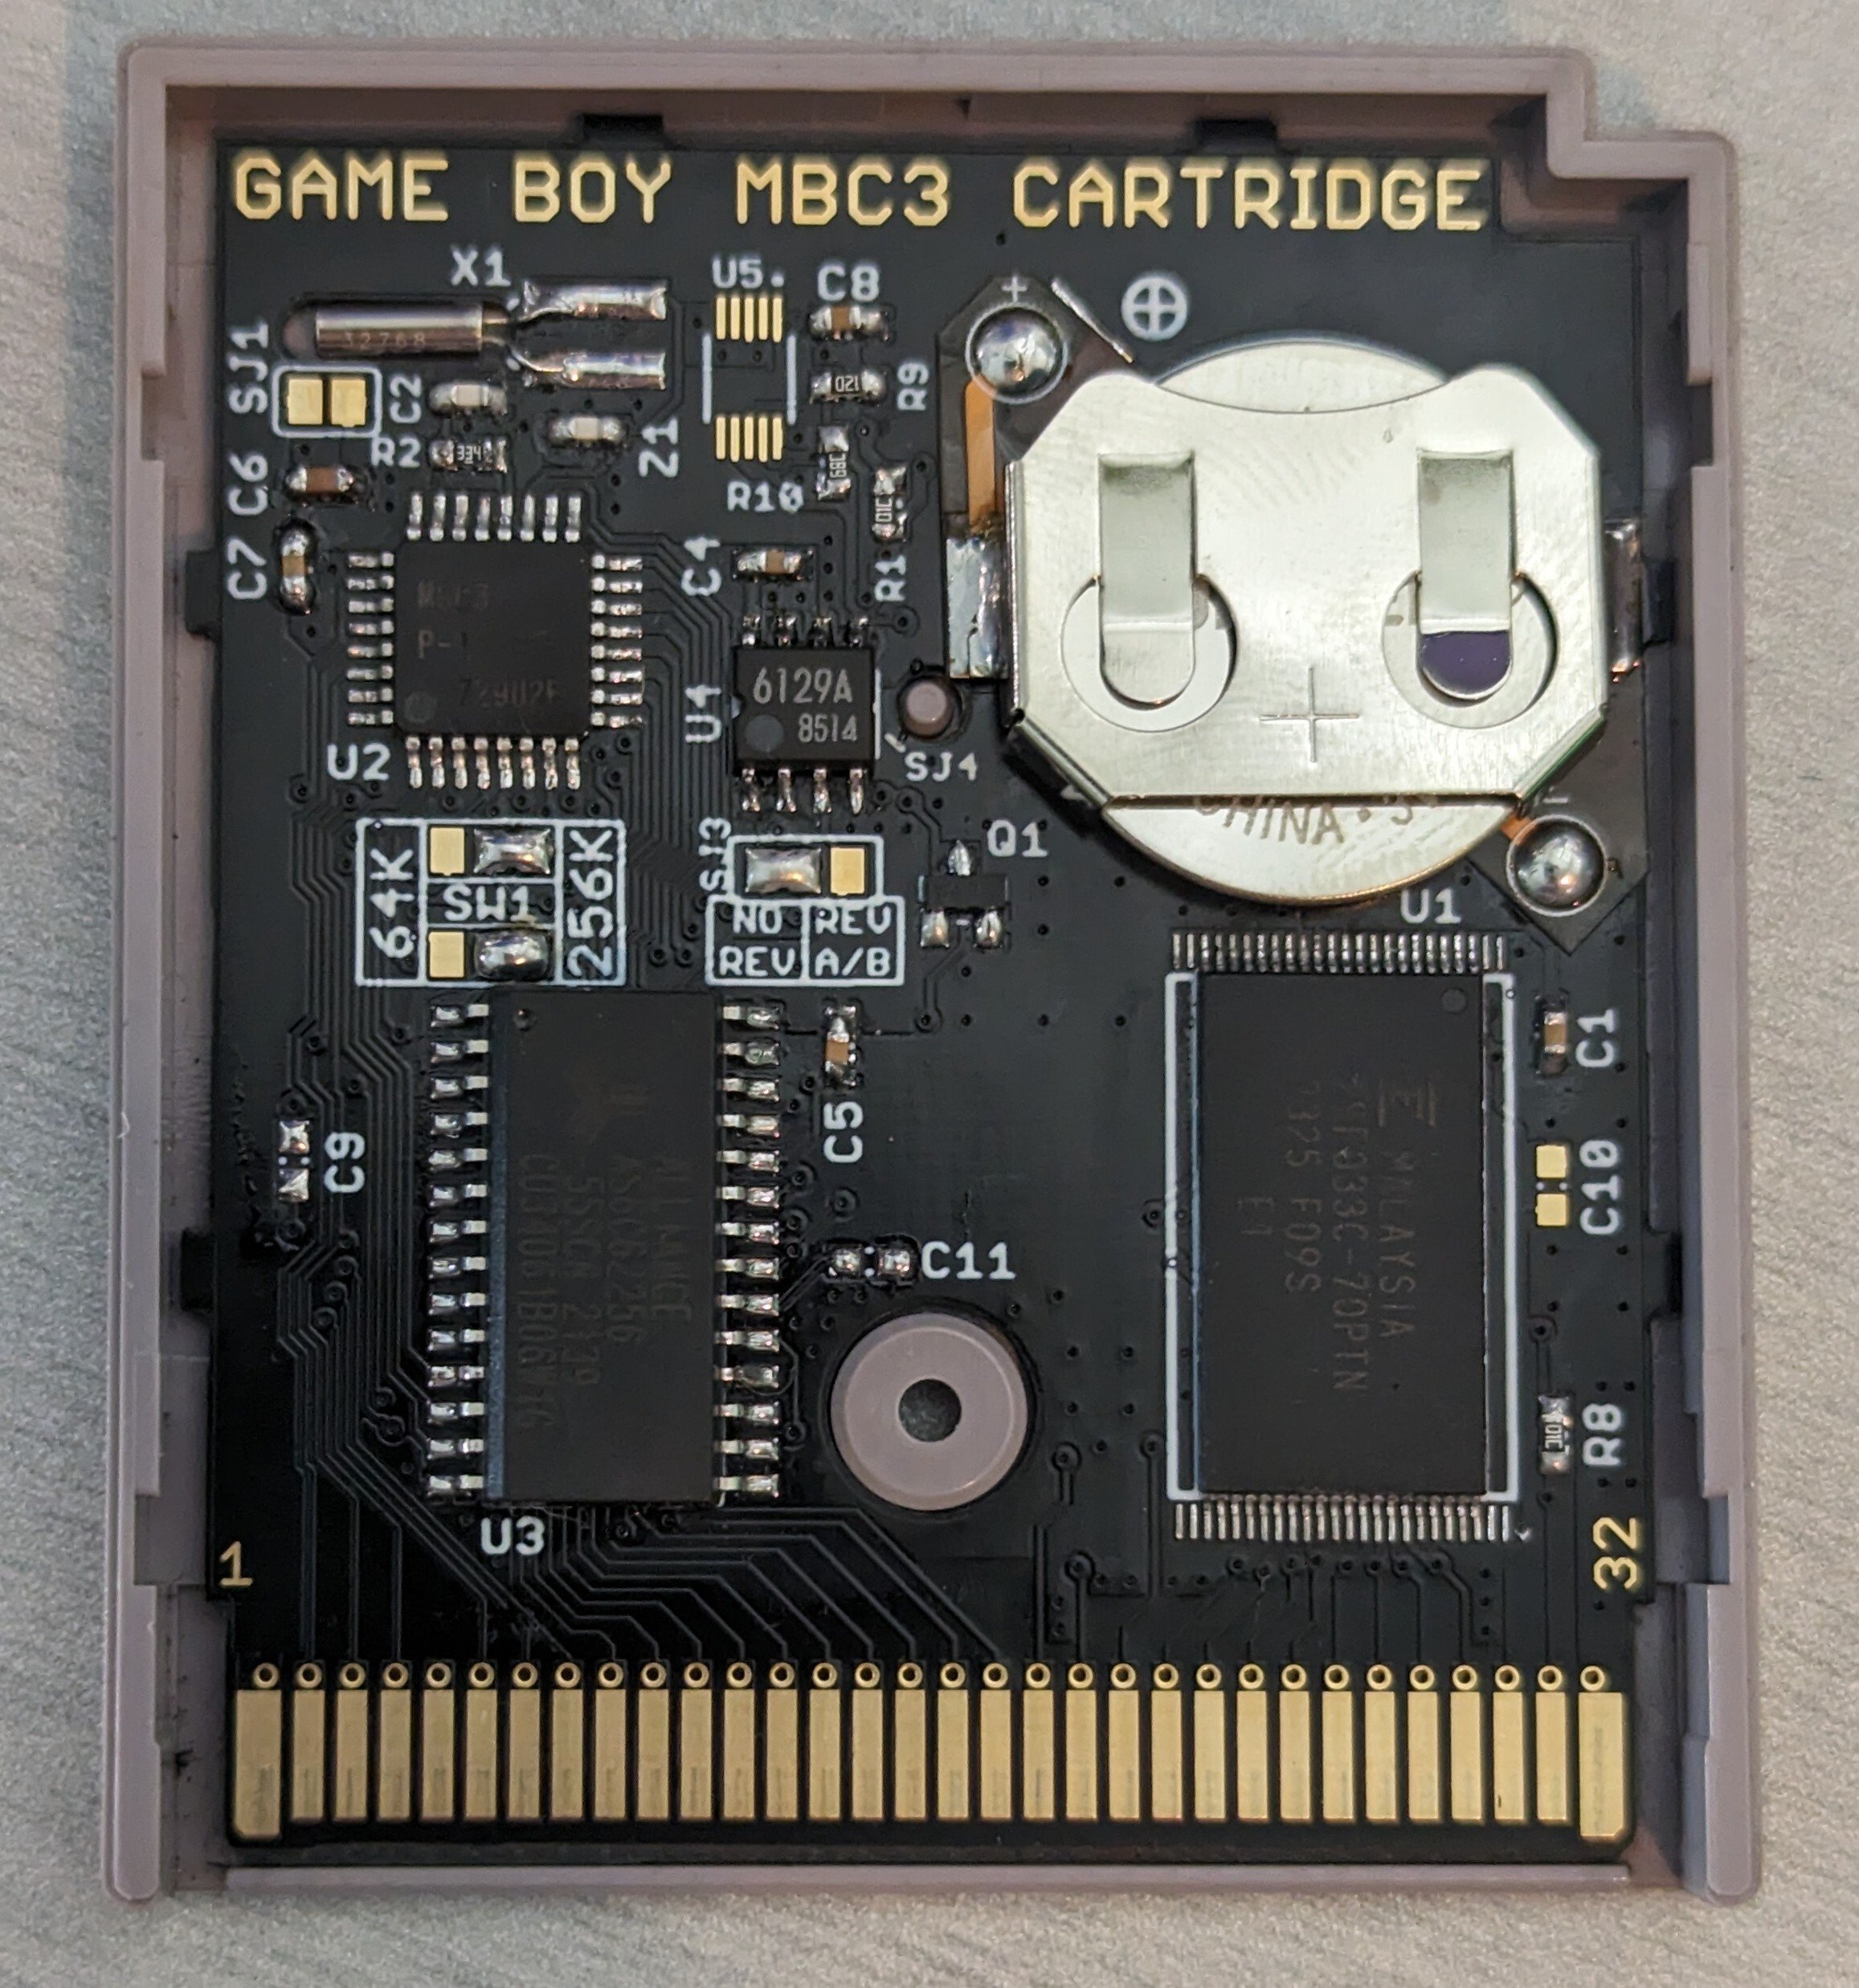
. 3 MBC1, 1 MBC3, and 1 MBC30


To add context, I'm the developer of this PCB and in no way affiliated/compensated by the seller. Selling is permitted by the license so that's all cool. I do think you're better off learning basic soldering if you really care about original carts and doing fully diy, but there is now an option for buying.


I happen to have a board from my FunnyPlaying build so I figured I'd give it a shot. Used enamel wire to make the button contacts and got 3.3v from the cart slot. I also removed the caps as to not power any circuits that didn't need (CPU and RAM were donors to the other board). Power is provided via AA batteries.


Still very much a work in progress but it works reasonably well (about 8ms of lag). I want to ultimately create an easier to install PCB rather than the perfboard I used.

21
submitted 5 months ago* (last edited 5 months ago) by [email protected] to c/[email protected]
 

Bought this little kit for a few dollars on aliexpress awhile ago figuring it was an interesting project. I would not recommend it and I've already revered back to stock.

  1. It makes the cartridge bulge.
  2. The long term reliability is questionable (my chip seemed like a rebadge).
  3. It will not work correctly on the analogue pocket (and possibly the FunnyPlaying FPGA GBC).

Also I wouldn't use clips like this for the battery when you can use the HDR retainer. This was done years ago and I don't have any more of those on hand to replace it.


An update to my previous post. I was able to improive the average lag by disabling the serial monitor, passing a reference of the controller to the polling logic (eliminating the need to loop over the current state and previous state to determine if buttons should be pressed), and adding a 1ms delay between loops (should have realized that the board need some down time between calls). I've added the code since I think 8ms is a perfectly good lag result for a diy project.


Took a badly marginal gba pcb and transplanted the CPU and RAM into this new motherboard. The soldering was a nice challenge but I had an issue with the cart slot. A pin was bent, so had to fix that before games would boot. Very happy with the result. I've uploaded a picture of the back of the shell as well. https://imgur.com/a/opXFA5B

Also in person, the plastic is not cloudy at all. The motherboard is here https://funnyplaying.com/products/gba-custom-upgraded-motherboard-replacement?variant=40990162059325

view more: next ›