3DPrinting

15130 readers
20 users here now

3DPrinting is a place where makers of all skill levels and walks of life can learn about and discuss 3D printing and development of 3D printed parts and devices.

The r/functionalprint community is now located at: [email protected] or [email protected]

There are CAD communities available at: [email protected] or [email protected]

Rules

If you need an easy way to host pictures, https://catbox.moe may be an option. Be ethical about what you post and donate if you are able or use this a lot. It is just an individual hosting content, not a company. The image embedding syntax for Lemmy is ![](URL)

Moderation policy: Light, mostly invisible

founded 1 year ago
MODERATORS
76
14
Horrible underextrusion (sh.itjust.works)
submitted 1 month ago* (last edited 1 month ago) by [email protected] to c/[email protected]


Hey. A couple weeks ago I got my old ender 3 pro out of the basement and have been trying to get a decent print with it ever since. I managed to print out one benchy without issue, but ever since then every print I do would be plagued with awful underextrusion.

I've replaced a few parts, including the hot end and the nozzle, and even did this one hack someone suggested where you put a piece of PTFE tubing in the hotend, but no matter what the issue persists. My thought was it might be the creality filament I ordered, so I ordered a spool of hatchbox filament. But the problem ended up being worse on the hatchbox filament. I've put both in a filament dehydrator but it's made no difference. Both spools have tough sections along them that don't seem to melt as easily when I pull them out of the extruder, so I'm thinking that might have something to do with it.

Turning the print speed down and increasing the flow and temperature yielded better results, but it was still underextruding on every other layer.

I want to know if there's something I can or should do before I just give in and buy another roll of filament. I've probably spent enough at this point to buy a better printer, but I guess that's sunk cost for ya.

Edit: SOLVED! I just forgot to tighten the extruder tension arm, now it's working perfectly. Thanks to @[email protected]

77


I have to have that spider mech.

78
79


cross-posted from: https://lemmy.world/post/17097936

As usual, since I already wrote a monumental piece on this in the other community, I'm just going to give you guys the short version. The long version is in the cross-post link above.

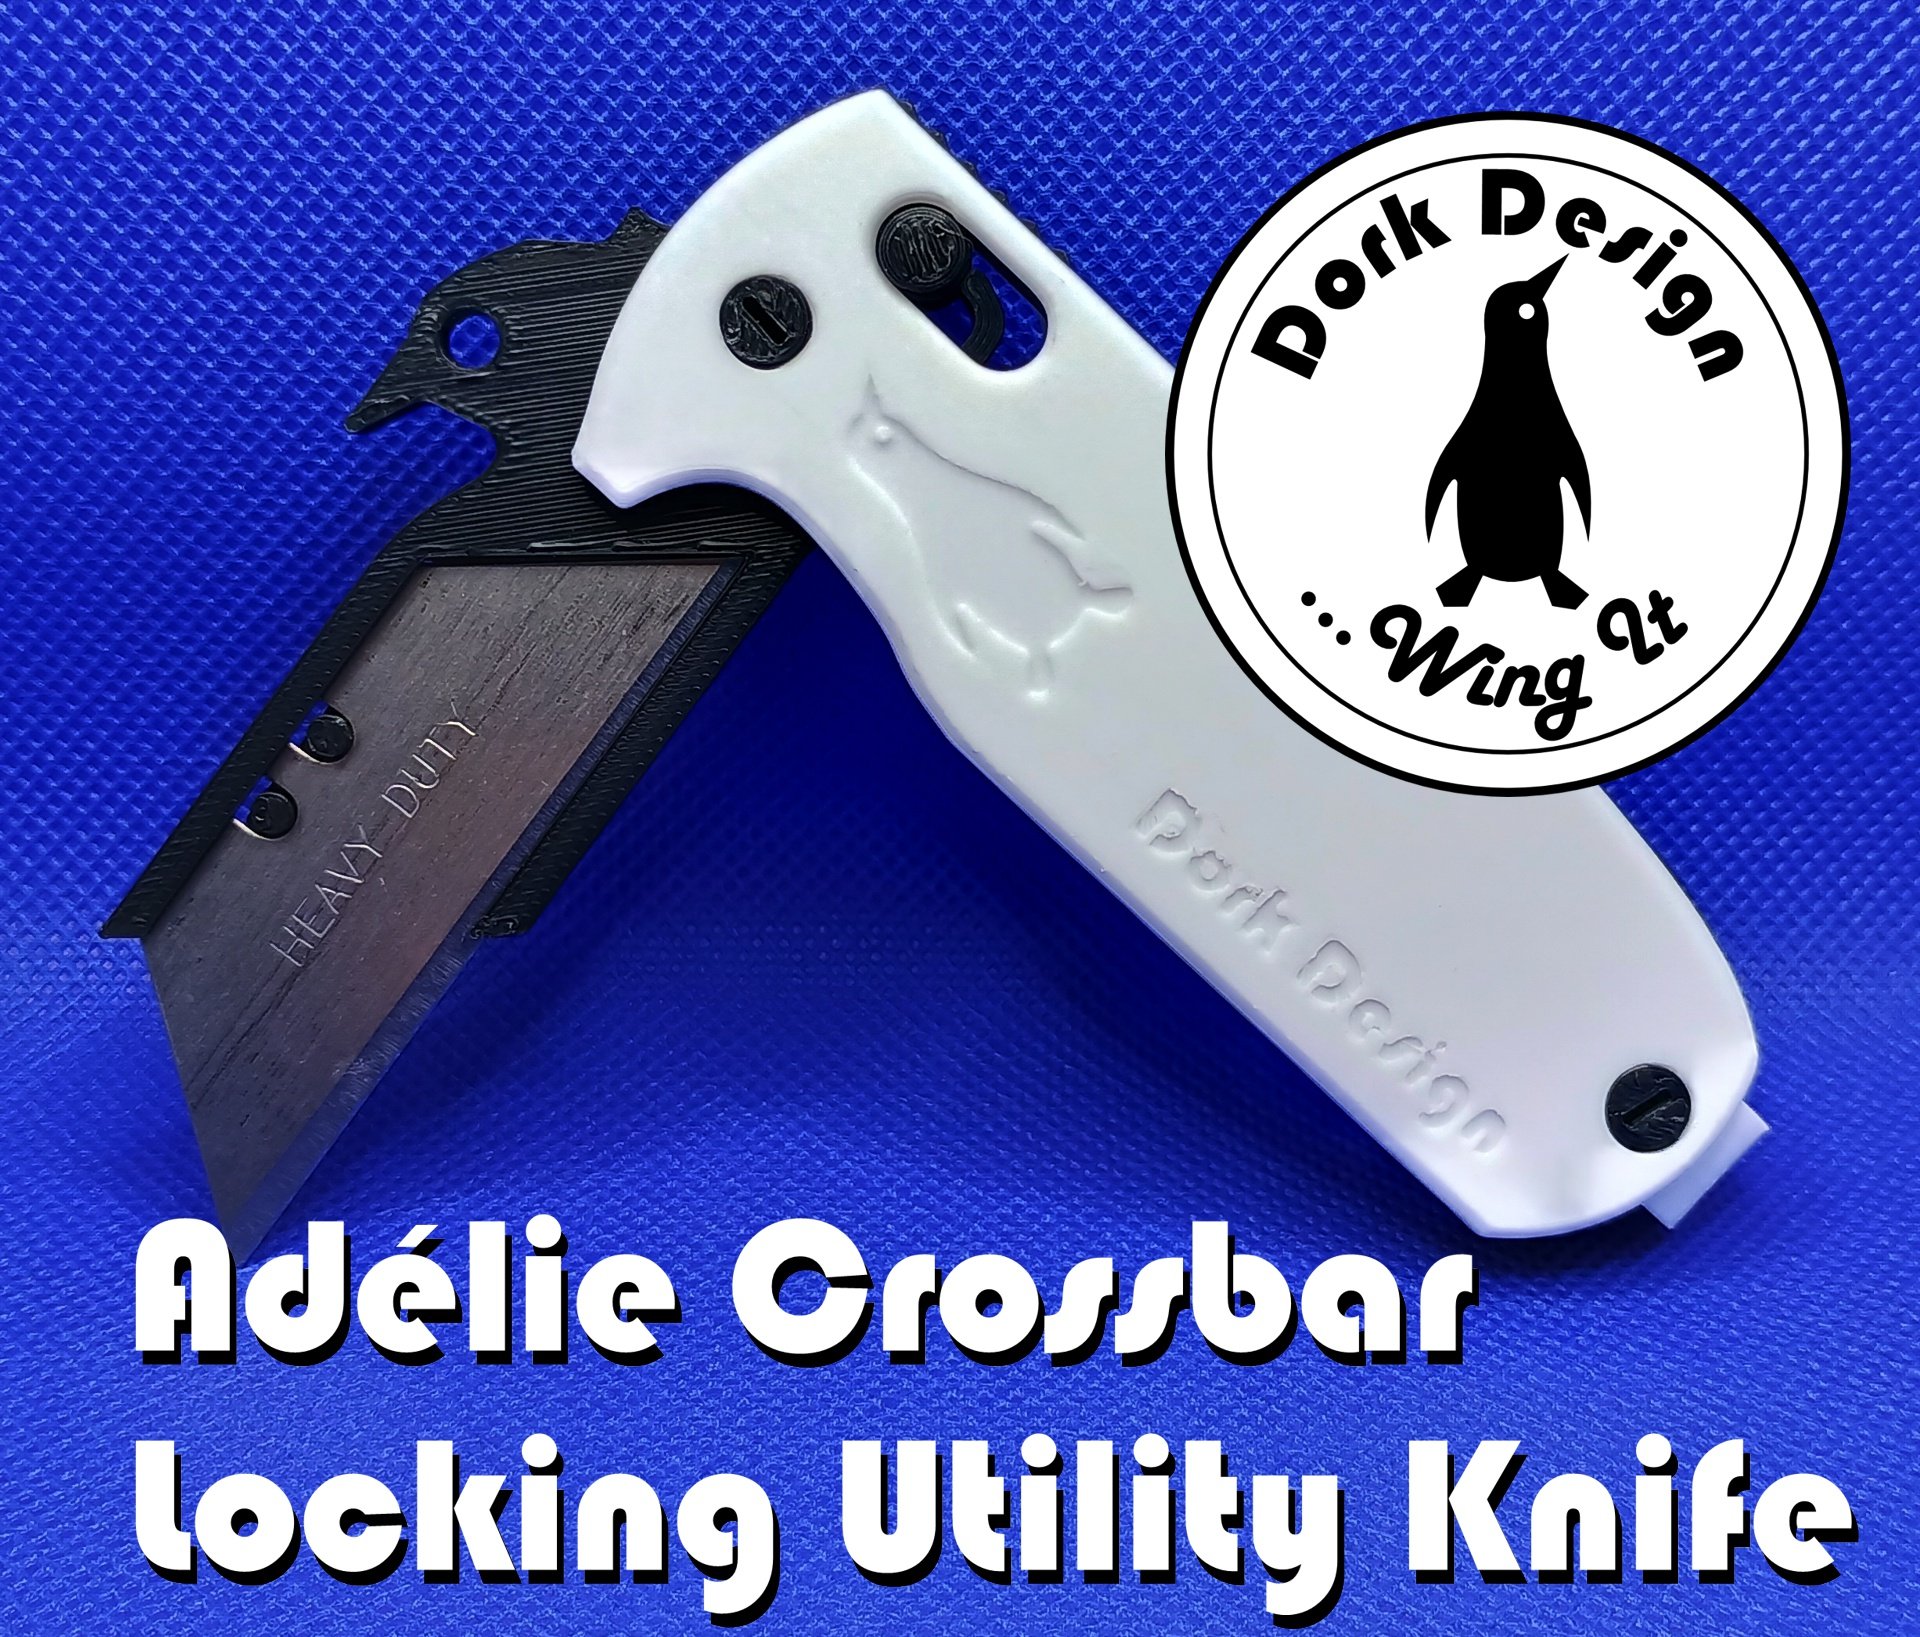
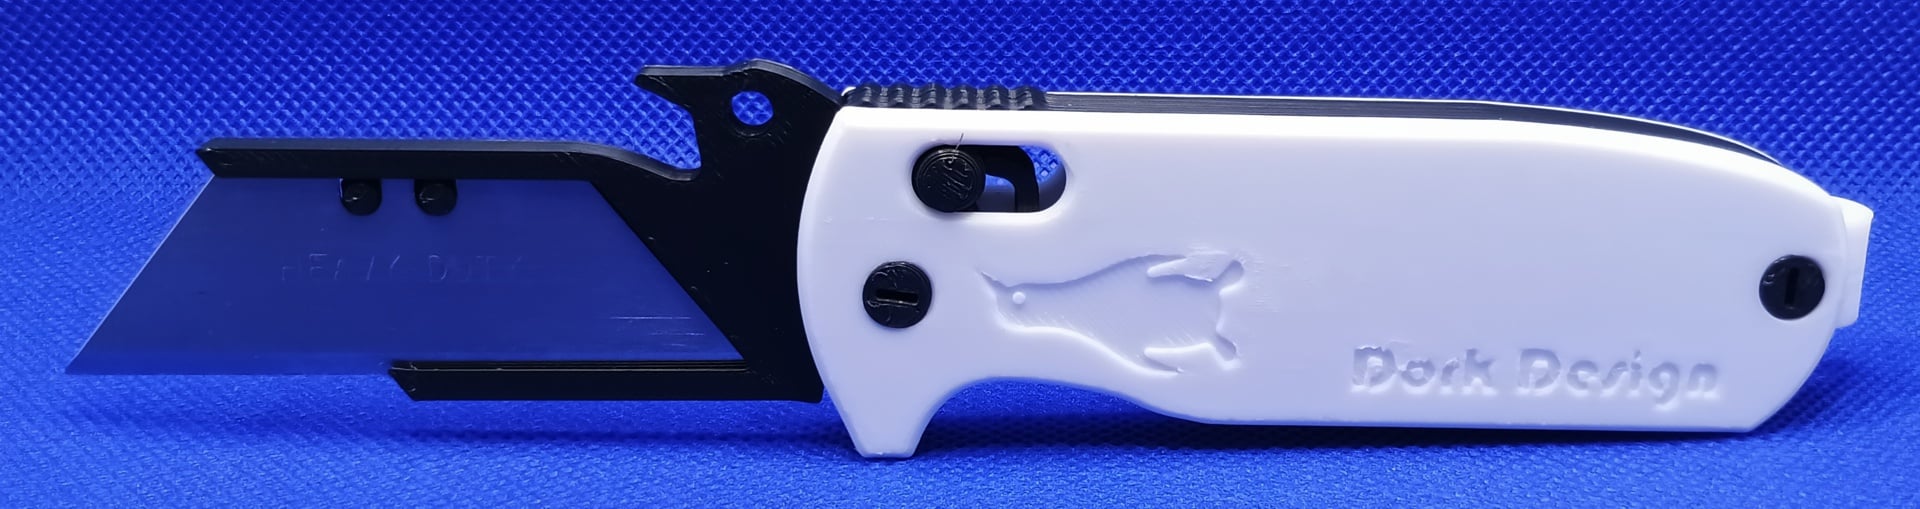
What it is: A 3D printable Axis lock folding knife, mechanically complete fully functional, with Penguin beak wave opener, one each. The world's finest; the world's only.

We're having great fun with this and other silly objects over on [email protected].

Jooooooin usssssss. You know you want to.

Printables link: Here.

80


I've been trying to troubleshoot a surface texturing issue for several weeks. I accidentally noticed the pulley had wobble, but thought it was the stepper motor at first. Nope. It's the pulley.

81


I'm interested in trying to build a Snappy v3

82


I started a print today as per usual and I randomly thought of something and am uncertain if it may already be a thing.

Independent perimeter layer height. Or basically, you take the set layer height, say 0.3, divide it by a user selected amount, in this case by two, and print some number of the outermost perimeters at that height until it reaches the set layer height. In this example it would print two outer perimeters at 0.15 layer height in two layers, and then proceed with the rest of the layer.

I thought this may be what variable layer height does, but it seems to vary the height of the whole layer in different regions. If there is anything like this that would be neat

83


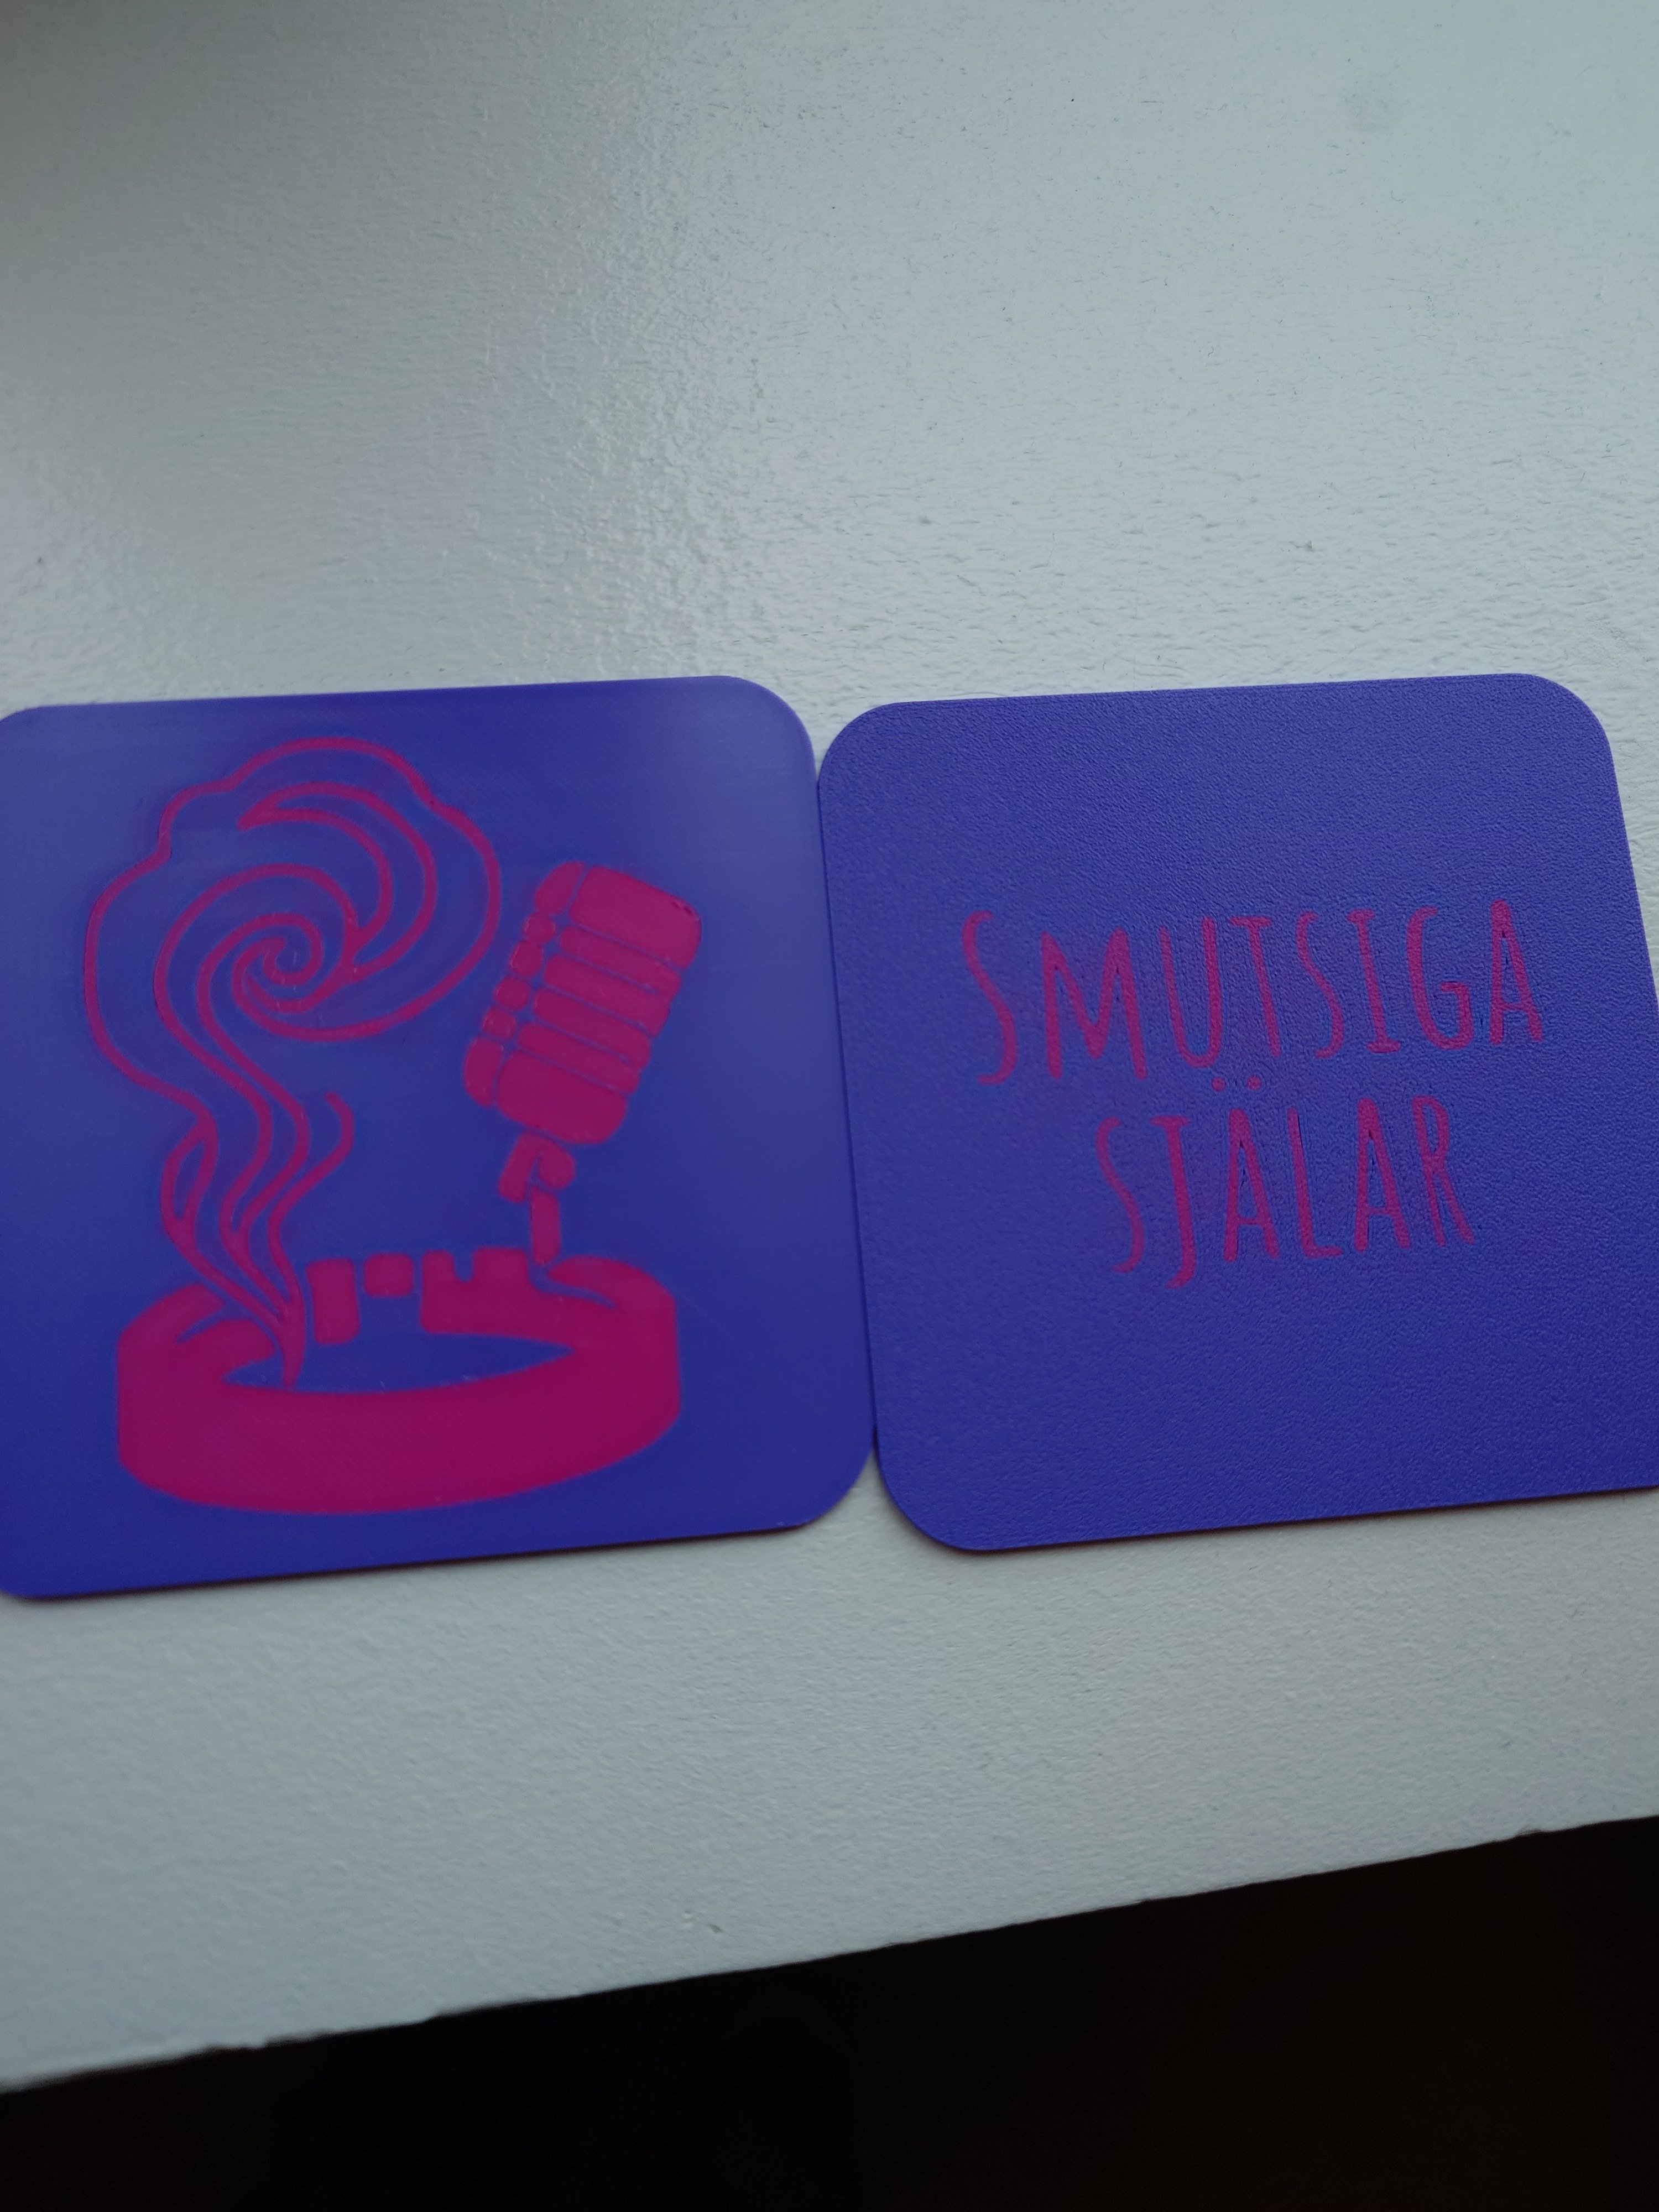
I'm working on a gift for a coworker who is resigning, it's based on a joke about the breakfast discussions being an excellent podcast.

I have 3 test pieces that I want to experiment on I want to smooth the surface and add a anti-slip surface to both sides. Any suggestions? Ideas? Comments?

84


I've watched a lot of resources about toner transfer over the last few days, and while everything was quite experimental and empirical, the main gist was : heat + pressure = toner transfer. As I didn't want to, for obvious reasons, cook a dial full of unknown glues, paints and metals in the family's kitchen oven, I started experimenting with my printer's bed.

So I made a janky setup. I printed my design mirrored on a laser-compatible transparency sheet, cut it to size, secured it on a sterile dial with a bit of Kapton and cut a bit of rubber to try and spread pressure evenly. I then clamped the contraption to my printer's heated bed.

Advantages: It's basically free if you already have a laser printer, transparencies and a 3d printer laying around.

Inconvenients: It looks absolutely unprofessional up close. At regular wrist distance, it's fine.

My first attempt was 30 minutes at 100°C. Way too much heat and/or pressure, the printing was smooshed and uneven pressure meant that parts of the design didn't transfer properly. The sheet's cutout shape was clearly imprinted on the glossy dial.

My second attempt (pictured here) was 15 minutes at 95°C. Much crisper lines and if not for a tiny bit of the logo that didn't transfer (probably a speck of dust underneath), would have been perfect. The sheet's cutout shape was still slightly imprinted on the glossy dial, on matte dials it might not be visible.

This process deserves to be refined as it brings an easy way to customize dials if you're not aiming at super macro beauty shots, unfortunately I don't have any spare dials anymore to experiment. I think a lower temperature and/or a lower pressure might work even better.

Edit: Here are my two attempts at making this dial:

https://i.imgur.com/QWKhzYG.jpeg

85


Edit: Just copy the original filename, Chinese and all, to a custom RERF file. It tested fine with the factory tests and also custom test parts I made. I didn't test with only "R_E_R_F.px6s" as the filename as I proved the original filename works fine with custom models.

Edit2: I had the motivation to check the file today without that Chinese and it works fine as well.

Just got a new Anycubic Photon Mono X 6Ks and the RERF file on the included USB has Chinese characters in the name. ("R_E_R_Fchch.px6s" / ch being Chinese characters...) Does the printer require those characters for custom RERF test prints, or is it actually just "R_E_R_F.px6s"?

The documentation is unclear and online searching is jumbled with several issues regarding this filename across different printer models.

86


In my previous post titled Low End FDM for Miniatures, Hobby Parts, and Messing Around? I received a ton of fantastic recommendations, but ultimately went with the A1 mini due to its price at the time, ease of use, and several other factors. It came in today, and I've already made 10 different prints on it. The Benchy came out wonderfully, and so has everything else so far.

Thank all of you for your help, and I look forward to continuing to be a part of the community.

87


So, a few days ago I've written about a then work-in-progress configurable calendar model and now we're ready to roll!

Features

  • The days are always correct - uses an algorithm to calculate the correct day for any date. So if you want to print a calendar for 2077, rest assured that the model will calculate the correct day for the 1st of January (it's Friday, btw).
  • Generate only select months - the full model measures 240x240 mm, which might be quite large for some smaller printers. You can generate only months 1-6 and then separately months 7-12 and voilá, it fits.
  • Choose how many months are on each row - what would it help cutting the calendar in half by only selecting half of the months if you couldn't fit 3 columns on your print bed? Well, just change the amount of columns, of course! Set it to 2 and the model fits again.
  • Custom holidays - every country has different holidays and here you can put them all easily!
  • No AMS or MMU? No problem! - supports printing both with AMS/MMU and without. With a simple toggle you can switch between multi material mode and a mode where each colored part has different height for manual color switching
  • Are Saturdays worth celebrating? - you decide! A simple toggle to toggle whether Saturdays have that holiday/Sunday color or not
  • Magnet or hook holes? - or both? You can configure the diameter, width, height and whatnot of either or both.
  • What the f…ont! - choose your font, choose your font size.
  • No hablo English? - just translate the calendar to your language! Title, month names and day names are all translatable.
88
 
 
89
20
Retraction Test (lemmy.world)
submitted 1 month ago* (last edited 1 month ago) by [email protected] to c/[email protected]


I read through the Orca Slicer manual on github, but I don't understand how the retraction test works. I have no idea how I'm suppose to distinguish the results. Would anyone like to explain in layman's terms what it is I'm looking for?

90


Abstract
Sanitation effectiveness of 3D-printed parts for food and medical applications has been established in a 4-month lab study and controlled tests. The present study examined the continued use of sanitation techniques across 3 more months of testing and experimentation in household kitchens. Multiple specimens of the most common thermoplastics for Fused Filament Fabrication (FFF), were printed with a range of settings to test for pathogen contamination, biofilm production, bacteria, or other pathogens masking (hiding) in the layer lines, gaps, and other imperfections of said prints. This study investigates methods of sanitation and cleaning to reduce or eliminate pathogens along with its biofilms from the defects and interstitial spaces that naturally occur in FFF printing. Results from various testing methods used in hospitals and FDA approved microbial surface testing, indicate that 3D printed parts of PLA/PLA+ (Polylactic Acid), and PETG (Polyethylene terephthalate glycol) can be cleaned to safe levels using warm water (120 °F), and non-concentrated dish soap. Examination and verification of cleanliness were completed via Petri dish preparations, and protein residue testing. It was found that Colony Forming Units (CFU) and Plaque Forming Units (PFU) had been reduced by 90%. Experimental results indicate that using 2g of baking soda, when used with soapy water, eliminates biofilms by chemical and physical action, neutralizes acidic bacteria, and removes mucus. It is recommended and tested by surgical technicians, that a 2-minute room temperature bleach water soak (200ppm), after washing and rinsing should be done to ensure pathogens are at safe levels. Acetic acid from vinegar was tested as well via petri dish for CFU reduction and can effectively eradicate biofilms due to the ability to penetrate the biofilm matrix and the cell membrane. It is noted to the reader that sanitation in this context refers to the method of bringing a surface or object to safe levels of cleanliness for food or medical preparation and storage. Furthermore, mass spectrometry readings indicate that no contamination from heavy metals, or other toxins are present in PLA+, and PETG before and after printing. Lastly, filaments made from a pull-trusion method from recycled soda or water bottles has been tested as well. When using 3D-printed items for liquids, it is highly recommended to coat the 3D-printed parts in resin. This is a simple, fast, safe, and very effective way to smooth parts to ensure easy cleaning.

91


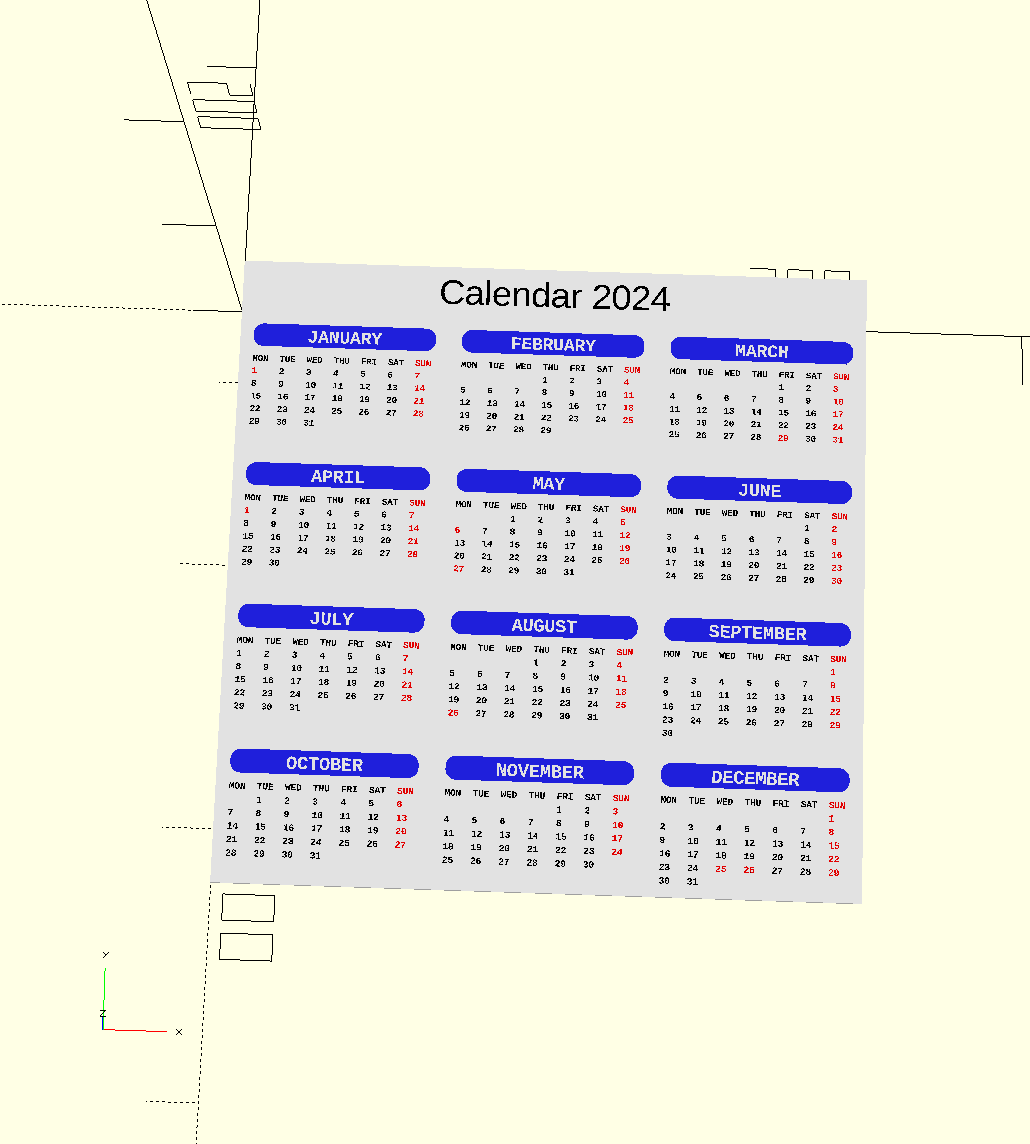
So, I'm making a fully customizable calendar in OpenSCAD with the following features:

  • correct columns for every date - uses an algorithm to calculate the correct day of the week for any date, you just change the year and the calendar is correct
  • fully translatable
  • supports custom holidays
  • supports both MMU/AMS and single extruder (with the help of M600 or similar)

Planned features:

  • configurable holes for magnets or holes for hanging the calendar
  • configurable first day of the week

I can share the SCAD file, though beware it's a work in progress and I haven't test printed it yet.

Some screenshots:

Click here to view the screenshots

UK calendar with holidays 2024:

UK calendar with holidays 2025:

Czech calendar with holidays 2024:


What do you think?

92


I have a huge bag of filament waste. Where should I send this? I know it is only commercially recyclable in like very specific cases so stuff like PLA will almost never be recycled. However, I do hear of companies accepting filament and they sell back the rolls and stuff. I'm not looking to make a profit or anything, just gotta get this off of me and I want the most sustainable way to do so.

93


So I wanted a small, and thin friction hing for another project, and I couldn't find the metal ones that they use for the iPad's Magic Keyboard case. So I design my own the parts I had on my desk.

The smallest nut that I had was 4mm wide which really limited how thick the design can be. The result is this

It folds flat at measure at a maximum thickness of about 10mm

It works a lot better than I thought it would, especially since this is my first prototype print. Need to figure out some things, like to stiffen the arms and to prevent/reduce twisting.

But as a basis to start from this works nicely. I think if I add a TPU washer on the back end, I might be able to get it stiffer and more consistent feeling. But I'll do that at another time.

94
35
submitted 2 months ago* (last edited 2 months ago) by [email protected] to c/[email protected]


The SV08 is marketed as a mass-produced Voron 2.4, with a much lower price and a very quick setup. They even say they donate a small amount to the Voron project for each sale.

Has anyone here bought/tested it? What are your thoughts about it?

Are there some limitations/downsides compared to a Voron?

Is it possible to upgrade it Voron-style (Stealthburner, enclosure etc)?

95
96


Currently, Prusa is doing a terrible job with the Printables competition, to the point where they could be in legal trouble if someone were to push for it.

A few examples to prove this statement (5th is in my opinion the worst):

  1. insect hotel -> canceled due to security concerns. Great work, but why not look into it before you start and provide a design guideline? https://www.printables.com/contest/436-insect-hotels

  2. Bathtub toys -> Mentioned explicitly: "Safety is our top priority, so make sure your creations are child-friendly, [...]". As these are bath toys, one might assume that they mean safety standards for young children. https://www.printables.com/contest/428-bathtub-toys

Great. Safety is a top priority. So let's see how they moderate it. They haven't... If you scroll through the valid submissions, there are dozens that aren't safe for children. Prusa is EU, so I would expect them to be familiar with the basic EU regulations for children's toys when they say we want safety first. There are very strict test requirements that a toy has to meet. The simplest one is a bin/cylinder that a part cannot fit into (choking hazard). Does every design meet this very basic design rule? No. Next comes impact resistance and the like. Does the design meet these requirements? no.

You could say that it's just not feasible to review every submission, so let's take a look at the winning entries that they definitely looked at: Rubber Band Submarine. I'm not a toy designer, but I'm pretty sure that an exposed rubber band is not safe for small children, who are the target audience for bath toys.

  1. fish tank tweaks: Recommending PLA for prints that are permanently submerged ("It is usually recommended to use ABS or specific food-safe PLA..."). Seriously???? These days they are PLA under these conditions is rubbish within a year. Discoloration and expansion destroy some PLA blends/filaments.

  2. soldering aid: Seeing this design as a winning soldering aid raises serious questions as to whether the person involved has any practical experience in assembling electronics. Placing a PCB 2cm in the air with sharp objects around the mounting holes is the opposite of ergonomic and comfortable SMD soldering: https://www.printables.com/model/740818-parametric-stackable-pcb-standoffs-m2-m14-holes

****5. This contest had questionable practices and here's where things get wild. Now we're not just talking about knowledge gaps, we're talking about breaking your own rules, which could be a legal problem. One of the contest rules states: "A valid entry may change its slope, altitude or distance." Simple. Right? Not for Prusa: https://www.printables.com/model/837104-the-rig-r11-diy-helper-stand-for-testing-electroni

This is a winning entry that can't do any of those things, and would probably qualify as a generic holder (also not a valid entry).

Another winning entry that wouldn't be a valid entry if Prusa followed the contest rules: "Skip the organisers: We love a tidy workplace, but today we're focusing on ergonomic improvements": https://www.printables.com/model/808502-heat-insert-press

Want a third from the same competition? Here it is: https://www.printables.com/model/808502-heat-insert-press "Specific adaptability: Designs must provide flexibility in the user's interaction with the tool or aid (height, tilt, distance or orientation adjustments). Simply accommodating different sizes of objects doesn't quite fit the bill".

To recapitulate, Prusa broke the rules not once, not twice, but three times within this competition (which, being EU, has some legal requirements on how you can and can't run competitions) by awarding prizes with monetary value and talking them away from other competitions that followed the rules.

There is more wrong with how this was organized/done, but I think this is damning enough. Never assume evil, so I would kindly call it Prusa being utterly incompetent.****

  1. The current XPR challenge. Design a part for a robotics kit. Sounds exciting. First bummer, it's $115 + tax, but that wouldn't be noteworthy enough to write this:

6.1 To design for it a.) either buy it (providing a $35 discount if you do so) or b.) try to work with whatever this is: https://www.printables.com/model/576581-xrp-robot-part-of-the-experiential-consortia/files the picture shows a complete model with PCB and sensors (some connectors and wiring are missing) but would be workable. What do they actually deliver? The frame with no electronics or components. Good luck working with that.

6.2 While this may or may not go in the direction of predatory, there is more: "Photo quality - Well lit, in focus and clear photos will help showcase your work and help us choose the best designs." Quick questions: How do I take good and compelling photos without the $115 robot kit? | Prusa: "This also means that you don't need to own a 3D printer to enter". Question: "How do you make photos without a 3D print to show of? the wording is very clear that they mean photos and not computer 3d-Render. Just by looking at these two aspects, this thing has a $115 + tax ticket to improve the "chance" of winning.

6.3 Moral issues: This work is unpaid to begin with. Does Prusa really expect people to spend tens of manhours working on a good design, printing it, taking pictures, writing instructions and text, when they have absolutely no use for it themselves, since this kit has probably only been sold a handful of times to end users. There is only a small chance of wining something (remember exhibit 5 where they didn't even follow their own rules)?

Last but not least: "Popularity – Share your model to increase its popularity, and prove that users appreciate such a model." This is fairly common for some events and I always dislike it as this asking for free advertisement. Prusa at least limits it to the model itself while others use a broader approach where it is for the entire project/organization. Regardless such terms always have a negative impact. Just remember all the MakerWorld spam everywhere after they launched with high rewards.

97


I love in Colorado, which is a pretty dry state, so while I had heard of "wet filament", I never considered it to be a problem that I would have to worry about. I had seen people creating dry storage bins for their filament, but figured that must just be for people in humid climates.

When I first bought my 3D printer a few years ago, I did what most people probably do - I bought a 10 pack of different filament colors. Everything printed great for a while, but eventually, my prints just started to kind of suck. I made a few upgrades to my printer, but still couldn't pinpoint what was going on. What was frustrating, is that some times my prints would be great - but other times I couldn't even print the most simple prints without problems.

I eventually noticed that my great prints were from newer filament that I had recently purchased, but my bad prints were coming from spools I've had sitting out for a while. So I purchased a $40 filament dryer on Amazon and it instantly fixed all the problems I'd been having.

I feel dumb, because I had gone through three different extruders, new hot ends, new nozzles, tubing, and spent tons of time cleaning and tightening stuff on my printer. I had left my printer untouched for months because it was just so frustrating. Something as simple as old filament left out never occurred to me until much later.

TLDR; If your prints have started to suck after a while, you might want to try drying your filament.

98
45
submitted 2 months ago* (last edited 2 months ago) by [email protected] to c/[email protected]


It’s just this design, lightly sanded and painted.

99


Hi everyone, a week ago my printer (heavily modified Neptune 3) started randomly shutting down in the middle of prints. I come back to a print with the "Klipper reports: SHUTDOWN / Lost communication with MCU 'mcu'" error message.

The printer has been "under construction" for the last couple of weeks, but it has been in varying states of "working" for most of the time - working well enough for me to print the parts I needed to get it back to "fully operational". During this time, the printer never shut down like it is now.

Only once I started making little cosmetic changes did the problem present itself. I was running a known-good print, and I got the above error twice (first time after ~2 hours, second time after ~1 hour) before I got a successful print off of it. This was last week.

After this successful print, I continued other prints with no issues. After a day or two with no problems, an hour long print threw the error at me four consecutive times between 10-45 minutes into the print. This is when I started looking into my klippy log and found some relevant articles citing things like EMF interference, bad power supplies, faulty cables etc. I realized that one of the changes I had made rerouted the printer USB cable right around the Z-stepper, so I rerouted it to how it was originally and immediately managed a successful print. This was 5 days ago.

After moving that cable I had no issues with printing several-hour long prints... until last night. I had been printing all day, then the problem came back. After one print finished, I queued up another print with a plate full of parts, it failed after 1.5 hours. Tried the same print again, failed in 30 minutes. I re-sliced to only a handful of parts to see if I could get those to print before the error occurs, and it's failing 15 minutes into the print.

The printer power supply is the unit that came with the Neptune, and it isn't powering anything besides stock hardware (exception being the SKR mini board), so I don't think it's that. The pi is on a quality unit. The USB cable has been working for a long time so I also don't suspect that, but I'm probably going to buy a new one today just to be sure. I adjusted my enclosure setup so that the Pi and SKR are able to get cool air (at one point had a personal fan pointing at the open electronics box, still failed).

Here is a link to my most recent klippy log (abridged to the start of the last failed print). I'm not very familiar with reading through this and finding oddities, but I do think it's strange that it seemed to load my preheat script in the middle of printing right before the EOF error. (It should be noted that this preheat script was made 1 or 2 failed prints before this most recent one, so it isn't the source of the error as prints were failing before the script was made). If there's anything I'm missing or something else I can try, please let me know!

Edit: While typing this post, I was running the same failed print without filament and both heaters turned off. It ran for about 45 minutes (most recent failure occurred at 12 minutes) so I cancelled the print and started it again with heaters turned on, still without filament. It again ran for about 45 minutes, so I again cancelled it and started the print again, this time with filament loaded. It failed in 5 minutes.

Edit 2: A test print with heaters on and no filament failed after 1h8m. So it isn't an issue with extruding filament.

Edit 3: New cable with the 5v leads taped off per @[email protected]'s advice. Ran the print without filament until completion. Reloaded the same file with filament, print ran without issue until the 1h14m mark, at which point I tapped my Klipperscreen device to wake up the screen, and as soon as it displayed the status, the printer errored out. This can't be a coincidence, can it? Whenever the print goes unmonitored for a long time, it fails as soon as I do something (load mainsail, turn on the klipperscreen) to check the status of it.

100


Would be so kind as to suggest a printer for me? I have no experience at all with 3D printers or 3D modeling. But I am super interested and have electronics and coding knowledge. I would like to print things like brackets, enclosures for custom circuit boards, organizers, keyboard plates, etc. Ideally I would like to spend around $300USD, but I am open to going as high as $500USD if it would save me headaches and make the experience more enjoyable and streamlined.

Please suggest something for me and let me know if I didn’t provide enough information. One final note, I live in range of a microcenter if that is a factor.

view more: ‹ prev next ›